
Your own music studio with JACK, Ardour and Yoshimi

François Téchené
Latest posts by François Téchené (see all)
- Black Friday - November 29, 2024
- Replacing the Screen of Your Librem 5 - January 25, 2024
- Working with the Librem 14 - November 22, 2023

Last week, after flashing coreboot on my Librem 13 (as a beta tester of the new coreboot install script), I came across a few problems with my heavily tweaked PureOS install, so I decided I would do a full, fresh install of PureOS 3.0 beta so my environment would be much closer to what a new user would expect.
While re-installing all my creative environment, I decided that I would do a quick tutorial on installing and using Jack as it is not straight forward and that there are not so many tutorials about it on the Internet.
What is JACK?
JACK stands for “JACK Audio Connection Kit”. It is a free software that lets you handle audio input and output between different applications.
You can see it as a set of audio jacks that you will be able to plug between different programs.
For example, you can use it to connect a software synthezizer (Yoshimi, ZynAddSubFX) to a multitrack sequencer (Ardour, LMMS).
You can use it to connect an audio editing software (Audacity) to a video editing software (Blender).
Many applications have Jack support. Here is a list from the JACK’s website.
As an example for this tutorial, I will show you how to use Yoshimi with Ardour.
Install the applications
First of all, we need to install all the required applications
sudo apt install qjackctl ardour yoshimi
Enable real time scheduling
Real time scheduling is a feature of all Linux based operating systems that enables an application to meet timing deadlines more reliably. It is also considered to be a potential source of system lock up if your hardware resources are not sufficient so, most of the time, it is not enabled by default.
As mentioned on the JACK’s website, JACK requires real time scheduling privileges for reliable, dropout-free operation.
There is a well detailed tutorial from the JACK’s team that describes how to enable real time scheduling on your system. I will go through the main steps here. It works for me on PureOS but should also work without problem on many other GNU/Linux distributions.
First of all, create a group called “realtime” and add your user to this group (replace USERNAME with your current login) :
sudo groupadd realtime
sudo usermod -a -G realtime USERNAME
You can check that “realtime” is now part of the user’s groups by running the following command :
id USERNAME
Also, make sure that the user is part of the audio group. If not, just add it :
sudo usermod -a -G audio USERNAME
On PureOS (and Debian), you should have a folder called /etc/security/limits.d. If so, just create and edit the file /etc/security/limits.d/99-realtime.conf with your favorite editor. (If you don’t see this folder, you need to edit /etc/security/limits.conf).
sudo vi /etc/security/limits.d/99-realtime.conf
Add the following lines and save the file :
@realtime   -  rtprio     99
@realtime   -  memlock    unlimited
You need to logout and login again for the changes to take effect.
WARNING : You should only add new or existing users to the “realtime” group only if an application that they use (like JACK) requires it . By doing so, you give them pretty high privileges to interact with the process priorities, and this may affect the whole usability of the computer.
Run JACK
Before being able to connect anything with JACK, we need to set it up and start its deamon. For that matter, we will use QJackCtl which is a graphical application that controls JACK’s inputs and ouputs.
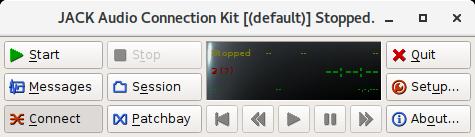
We will first make sure that JACK is setup correctly. Press the “Setup…” button.
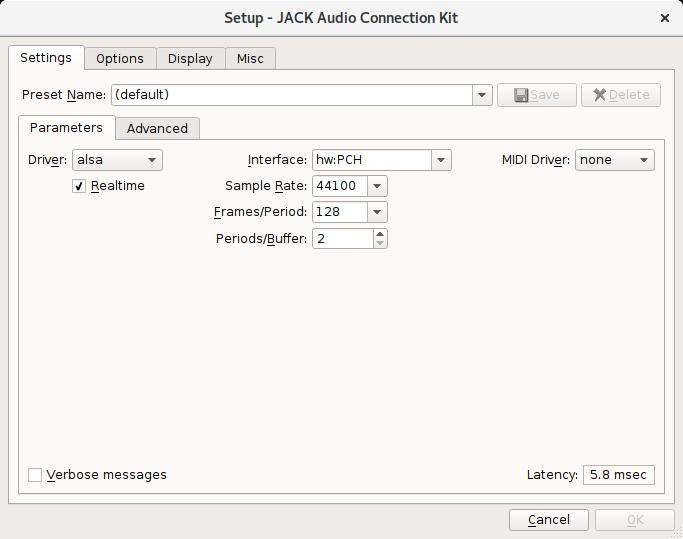
I am not an expert with audio hardware and configurations and this setup is working perfectly on my Librem :
- Driver: alsa
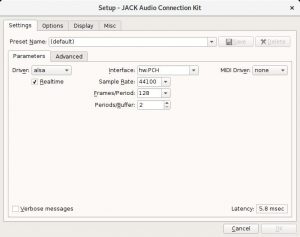
- Realtime : yes
- Interface : hw:PCH
- Sample Rate : 44100
- Frames/Period : 128
- Periods/Buffer : 2
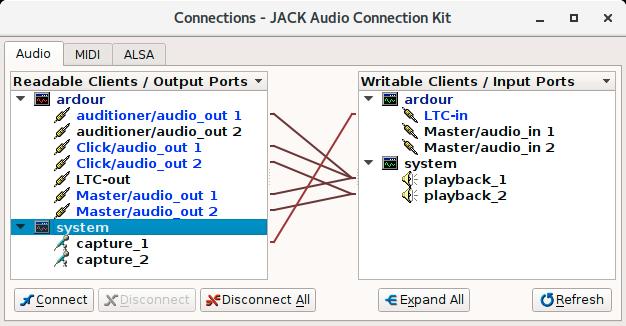
Save your settings and, on the main QJackCtl controls window, press the “Start” button. After a few seconds, you should see the “Connections” window popping up. This is where all the connections take place.
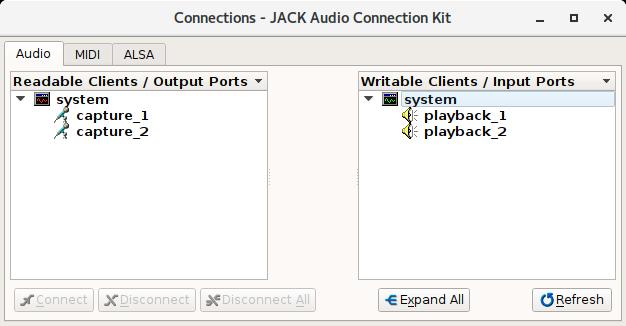
Connect Yoshimi to Ardour
Now, we are ready to connect our virtual jacks. It is time to open Ardour and create a new session. You should now see a lot more connections in the JACK’s connections window. It shows how Ardour interacts with the system’s audio inputs and outputs.
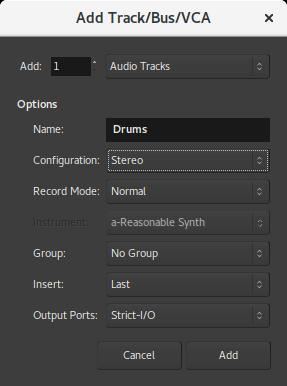
Let’s add a new track to Ardour. Click the menu “Track”->”Add Track, Bus or VCA…”. Call your new track “Drums” and set it as stereo.
Now you see 2 more Ardour inputs in the JACK’s connections window. They show the name of the audio track that we just created and they are currently connected to the default system’s capture device (the microphone). That is is not what we want so we will disconnect them.
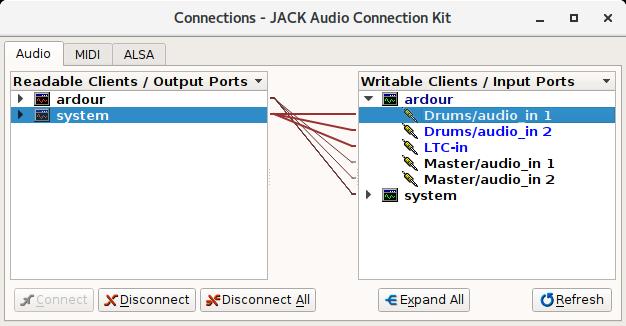
Right click on one of them (Drums/audio_in 1) and chose “Disconnect”. It will disconnect the audio capture device. We will now connect our track to Yoshimi.
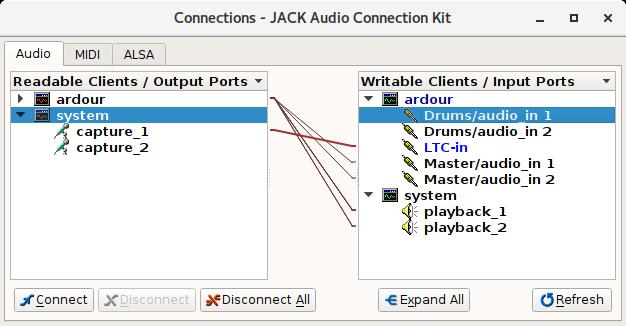
Open Yoshimi and wait for it to be fully loaded. You should now see the Yoshimi’s output appear on the JACK’s connections window. In order to connect the Yoshimi’s output to the Ardour’s input, just drag one on top of the other (make sure to respect the vertical order).
You are now ready to enjoy your fully operational free software powered professional music studio! 🙂
![]()
Please, feel free to comment this post or ask any question in our forums.
Have fun! 😉
Recent Posts
Related Content
- Google’s Lock Down Policy
- DHS Inspector General Study
- Privacy Under Siege: Why Purism’s User Sovereignty Model is the Way Forward
- Landfall: A Case Study in Commercial Spyware
- Librem PQC Encryptor: Future‑Proofing Against Both SS7 and Quantum

