
Animating Pepper & Carrot with a respectful laptop

François Téchené
Latest posts by François Téchené (see all)
- Black Friday - November 29, 2024
- Replacing the Screen of Your Librem 5 - January 25, 2024
- Working with the Librem 14 - November 22, 2023
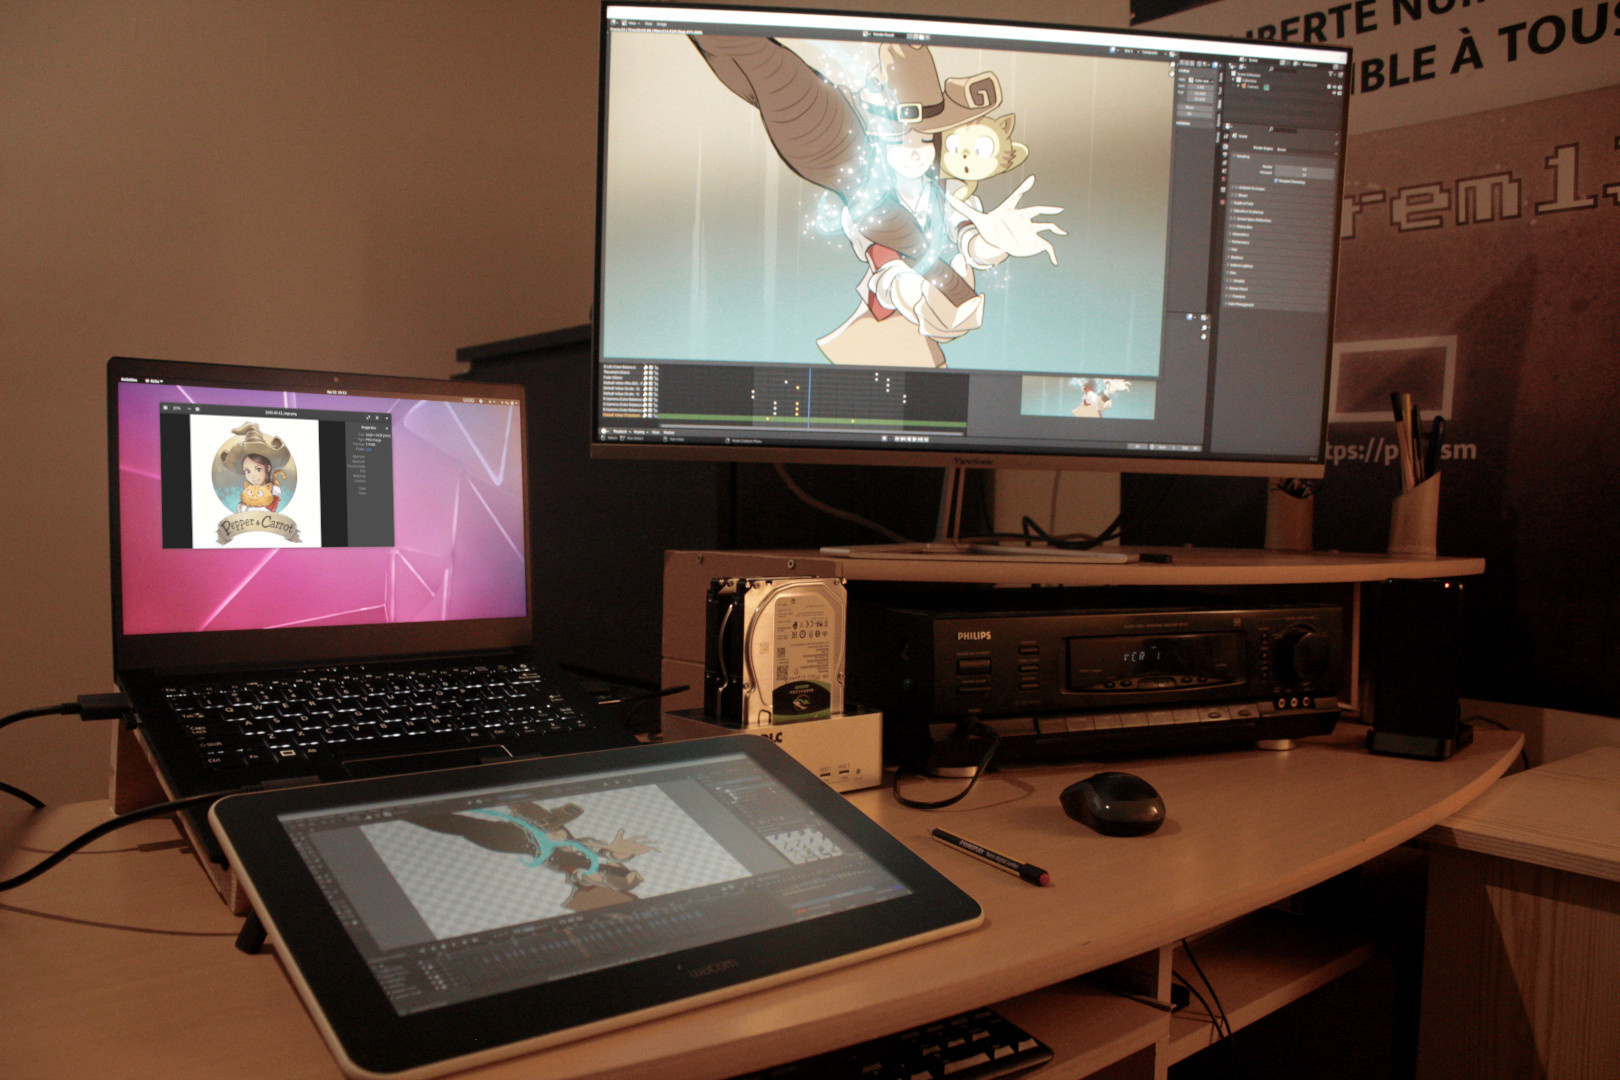
I made a 2D traditional animation as part of a project I am working on for Purism, with a goal to demonstrate the power of the Librem 14 as a creative platform.
Therefore, as a follow up to my previous post about making hand drawn animations with Librem computers, and as an addition to the amazing video editing tutorials from Gardiner Bryant, I wanted to share the process of making such a work with a Librem 14.
As the main project is quite ambitious, I am using a maxed-out Librem 14 with 64 GB of RAM along with a fast 2TB NVMe drive.
For this particular project, I have used the Librem with a brand new Wacom One tablet, all driven by PureOS and using creative software like Krita and Blender.
Setting up the tablet was straight forward, I just plugged and played! Everything worked perfectly out of the box, in the most respectful way!
Preparing the animation
The goal of this work is to show that the Librem 14 can run professional-grade animation software such as Krita and Blender to produce top quality 2D animations.
This animation would be a few seconds long and showing some fast action with an “Anime” like style.
For the characters, I decided to go with Pepper & Carrot from David Revoy because I am a big fan of David’s work and I think that the characters’ original style matches the style and action that I want for this animation.
This video highlights the different steps that I am describing in this article.
Making the rough animation
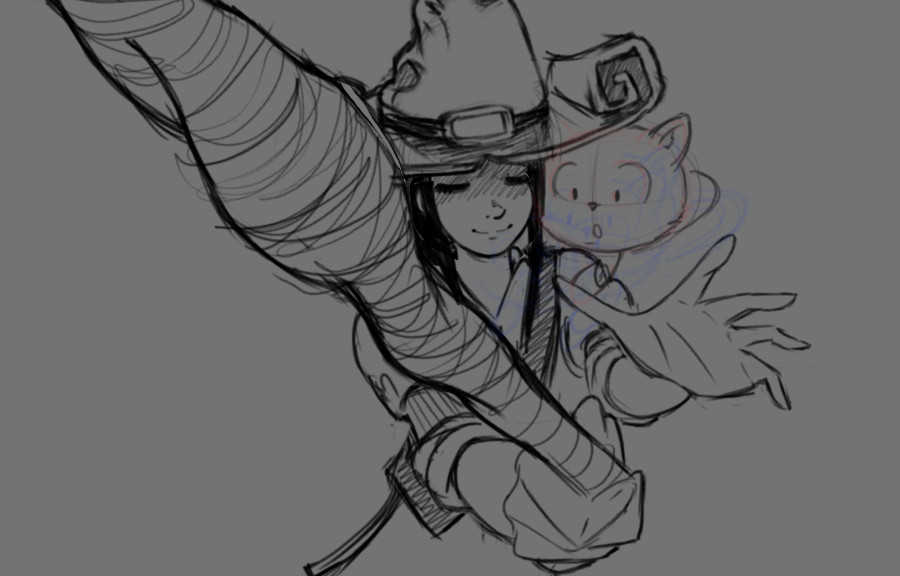
The animation being very short, I decided to skip the storyboard step and go directly into doing a rough animation. To prepare, I spent some time in researching some inspiration in existing Japanese animation and decided on a camera and character motion that give an impression of speed and power.
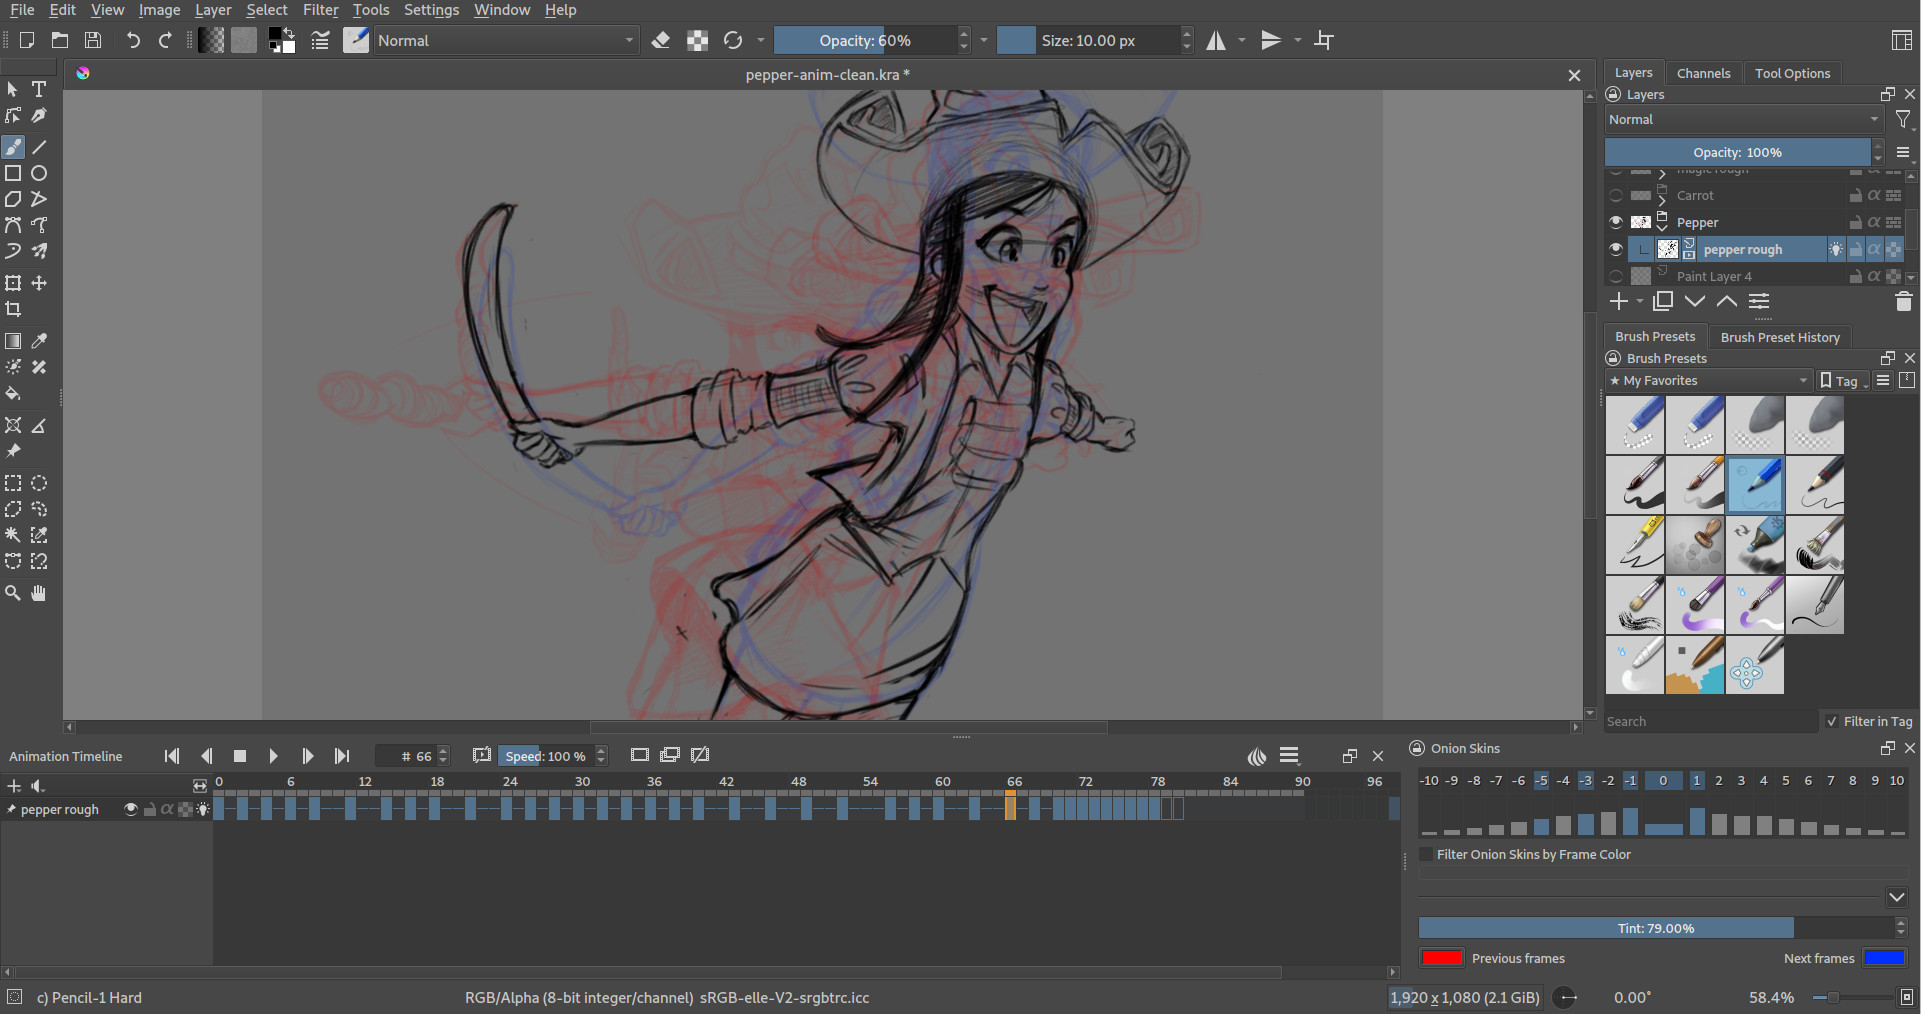
I used Krita for the rough animation. I first drew a few key frames that described the motion of Pepper. I like detailing a few of those drawings during this process to make sure I am not forgetting anything and to get a good overview of what I want to achieve.
Then, I go through the process of “in-betweening”, which means drawing the missing frames in-between the key frames in order for the action to look smooth.
The character of Pepper is not designed for animation and correctly animating the “curly” hat in space was a tough challenge!

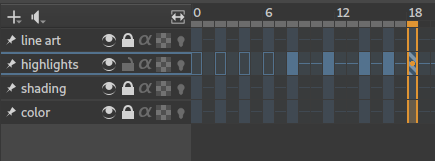
Notice that I drew 12 frames per second on a timeline that is running at 24 fps. That is to match the final video frame rate of 24fps.
You can also notice that I have made some gaps of 2 frames at some point or no gap at all. That is because I slightly changed the rhythm of the animation by slowing down and accelerating some parts of the motion.
I then added the motion of Carrot on Pepper’s shoulder once Pepper was complete.
Cleaning up
Once happy with the rough animation, the next part was to clean up each drawing with nice and smooth line art and prepare everything for coloring.
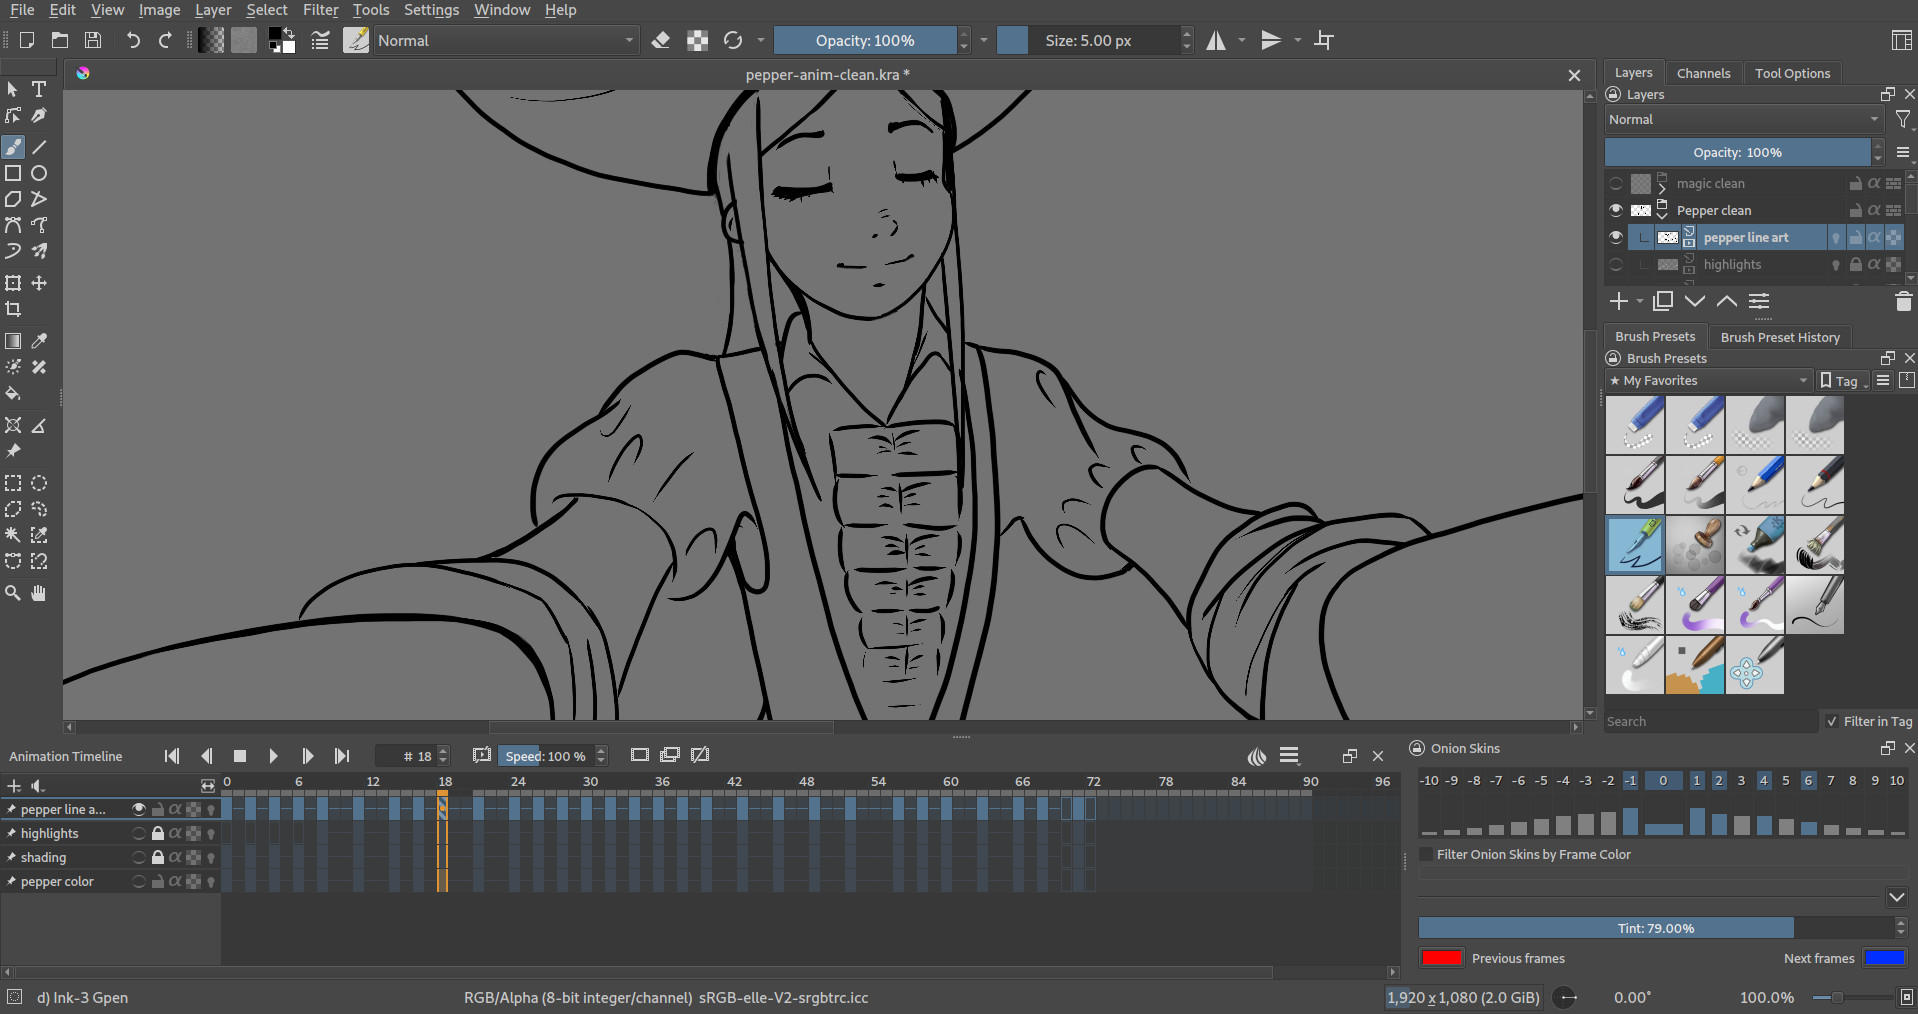
To do this, I put my rough animation layer in low opacity and draw the line art on a new layer. Usually, I would go for a vector based application for doing that, in order to more easily apply my colors in a vector based environment. However, hand drawing lines is not an exact science and it can lead to issues when applying colors. Therefore, I decided to stay on Krita for that task so I could quickly fix my lines and colors, the bitmap way.
Coloring
Before thinking about any shading, I first color everything with a flat color. For that, I used some reference images from Pepper & Carrot’s comic and picked some clear and bright colors for each area.
I create a new “color” layer under the line art layer for applying my colors.
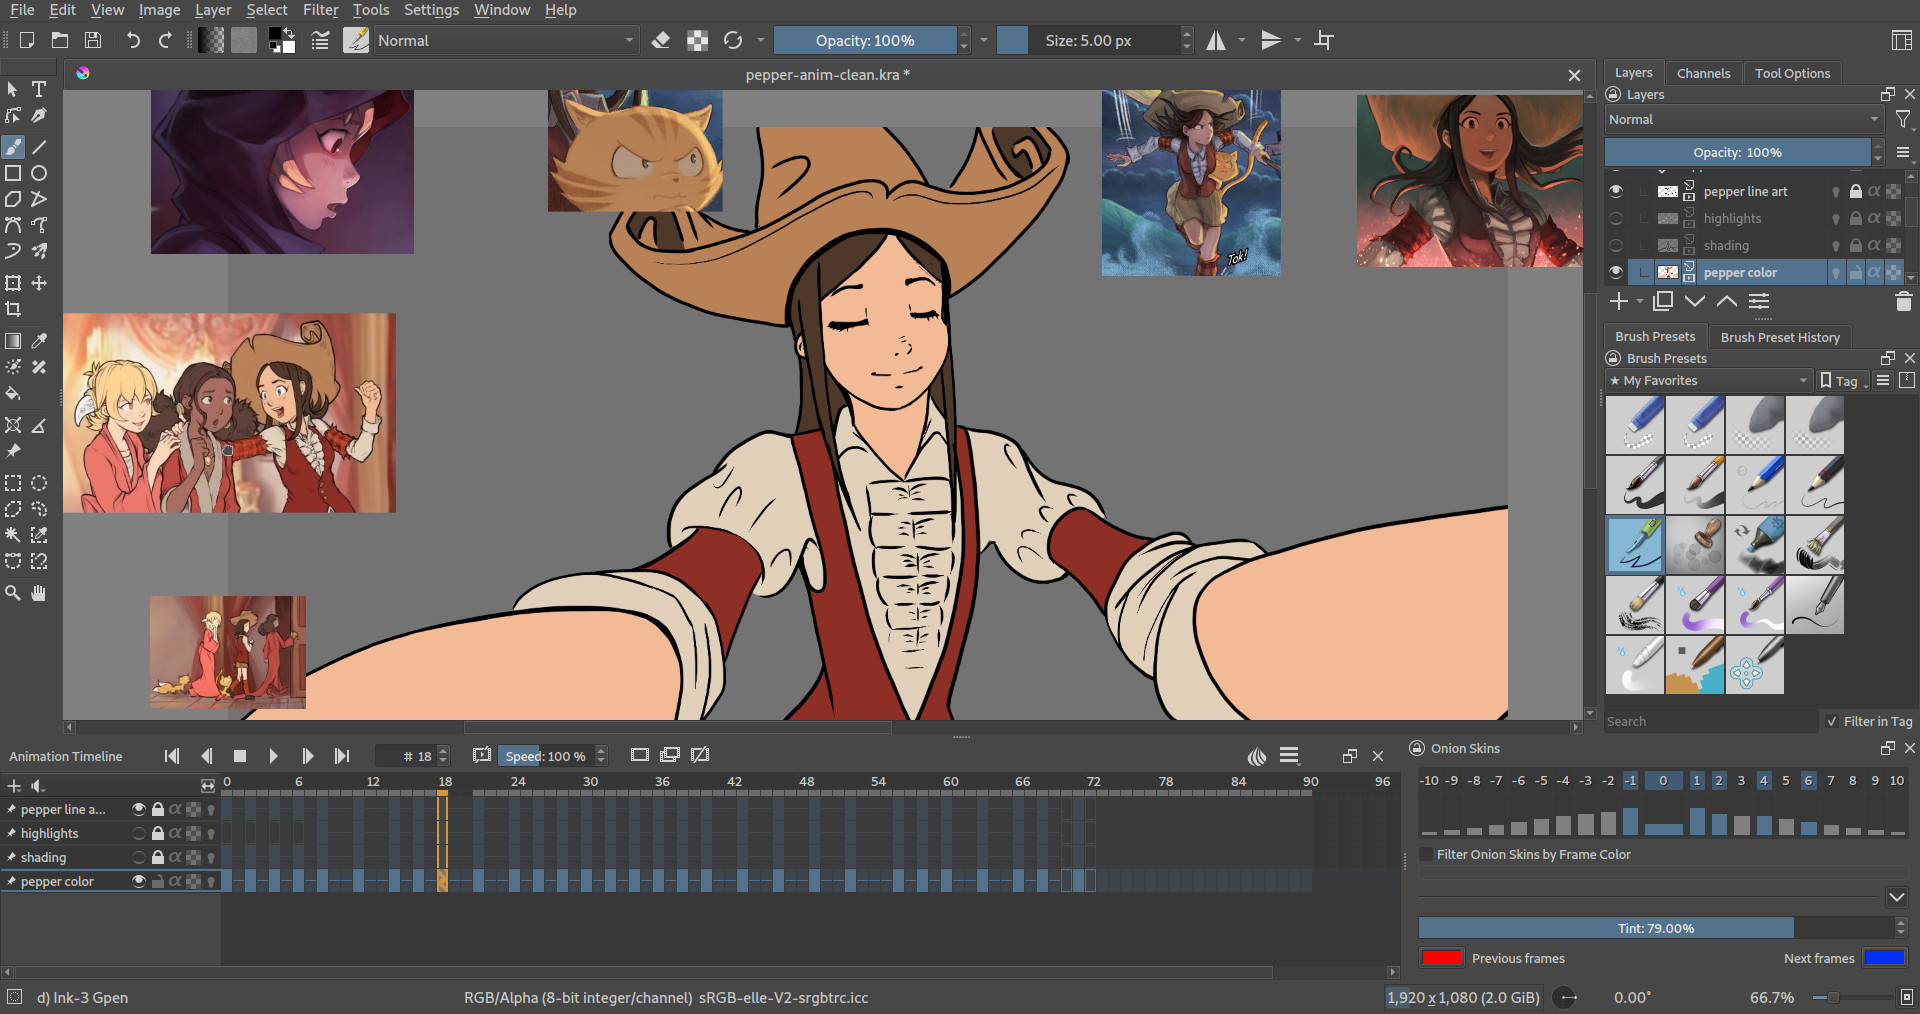
Krita has some pretty good coloring capabilities and the paint bucket tool is pretty full featured. I would appreciate a “close gap” feature, but I believe that it is a work in progress.
Shading and highlights
In order to apply my shading, I create a new layer between the line art and color layers. I then draw and fill my shading as a black solid color and lower the opacity of that layer to around 50%. I use the black color in order to have a neutral shading color that I can more easily tweak later during the color correction process.
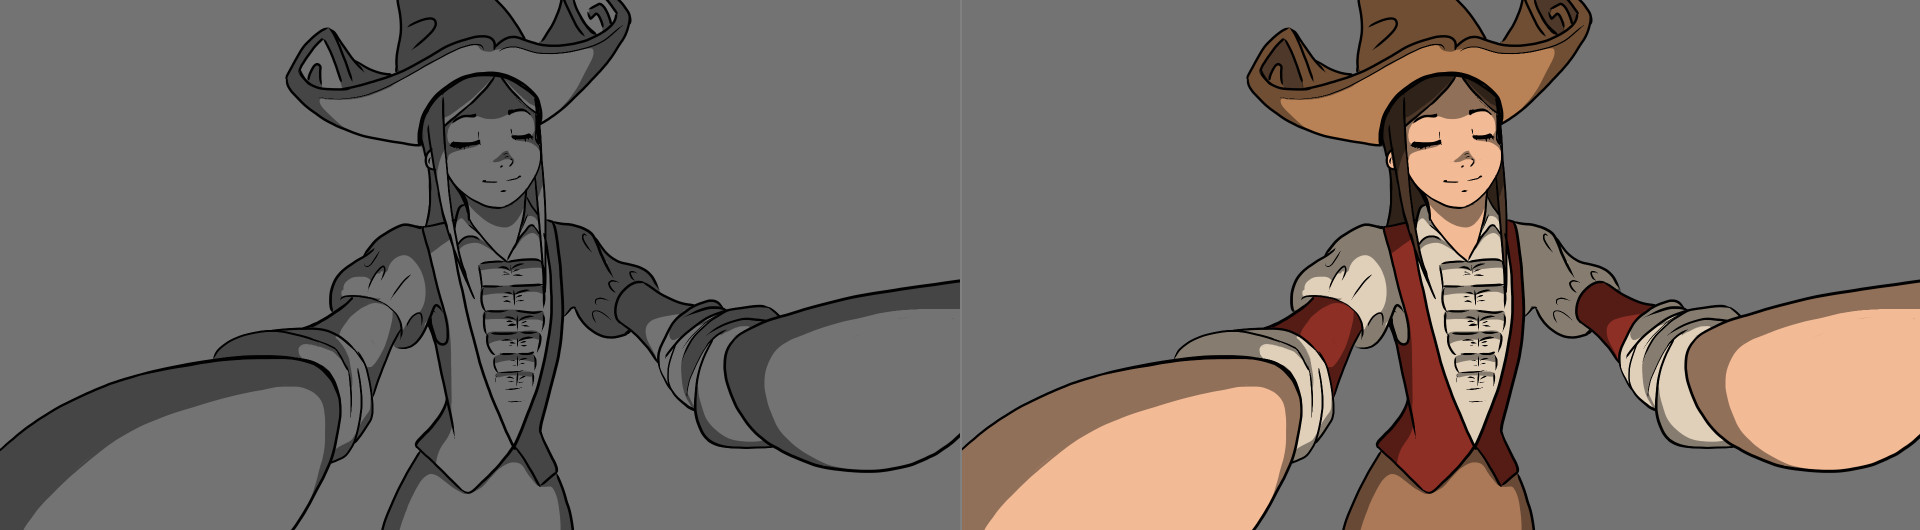
After making my shading, I also apply some highlights to simulate several light sources (in this case a back light that is opposed to the light from the magic wand). This way, the character gets more volume.
For the highlights, I create a new layer on top of the “shading” layer and apply pure white colors while lowering the opacity of the layer to the required value.

Compositing
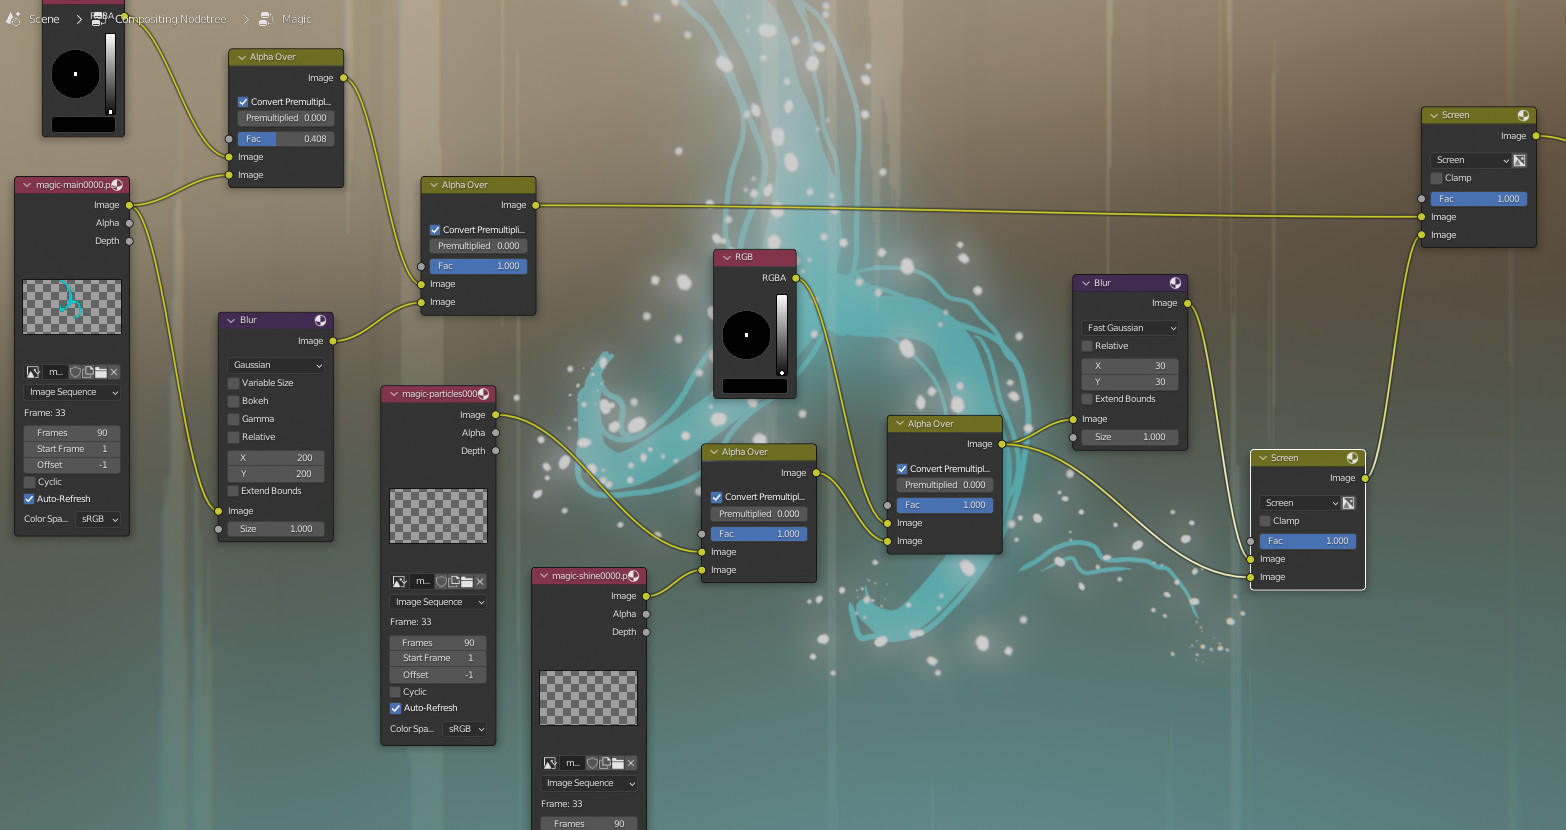
For handling the final composition of my animation, I render my characters along with the magic lights animations as separate image sequences and I move everything to Blender.
Blender has a powerful node editor that I am using to combine the characters with a background (that is made of a flat gradient and speed lines animation) and the renders of the magic lights that I have animated in Krita.

I have added some glow effect to the magic by overlaying the flat colored light effects drawings on top of themselves with a blur effect.
And here is the final result.
This animation is just a small part of the final project and I will be going through more creative work with my Librem 14. So stay tuned for more “behind the scenes” articles.
Recent Posts
Related Content
- Google’s Lock Down Policy
- Privacy Under Siege: Why Purism’s User Sovereignty Model is the Way Forward
- Privacy Under Siege
- Sim Swap Attacks Surging
- Landfall: A Case Study in Commercial Spyware

