
Digital media transcoding – Part 2 – FFmpeg GUI with Kdenlive

François Téchené
Latest posts by François Téchené (see all)
- Black Friday - November 29, 2024
- Replacing the Screen of Your Librem 5 - January 25, 2024
- Working with the Librem 14 - November 22, 2023
This is the second part of my articles about media conversion with free software. Here is part 1.
This time, I will talk about transcoding your files with a nice and flexible graphical user interface.
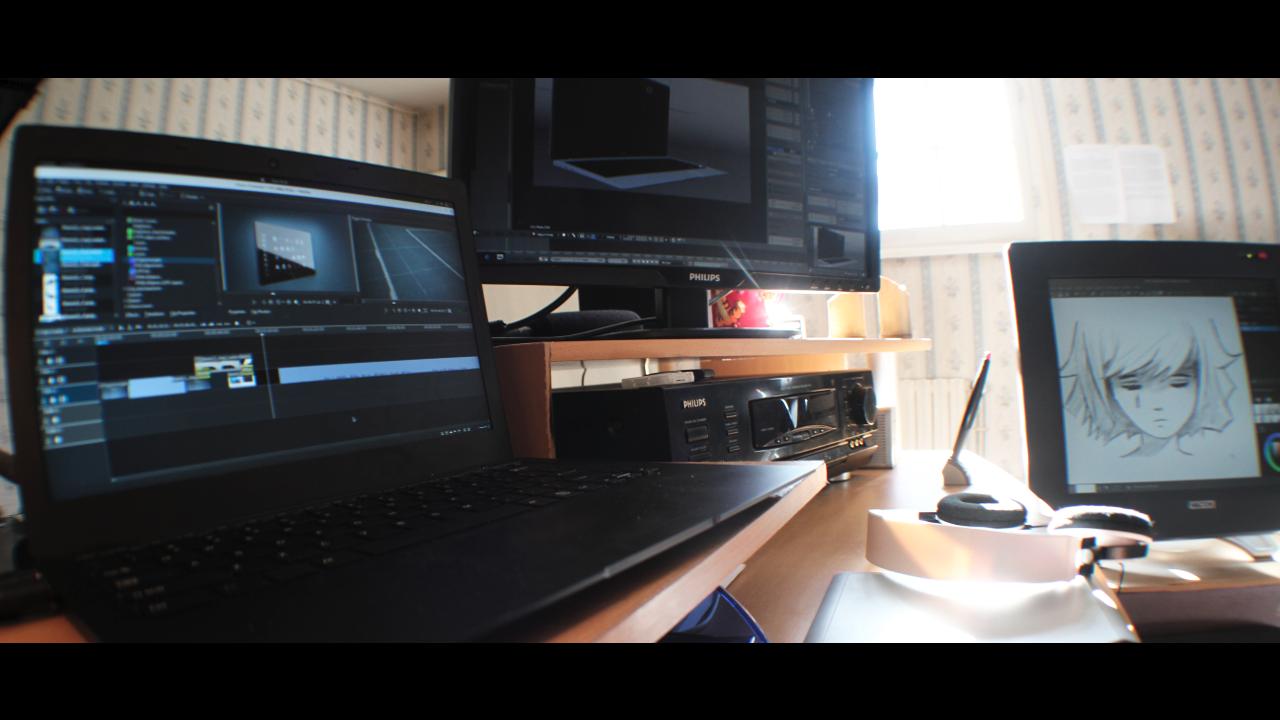
I have been looking for a free and open source front-end to FFmpeg that would just specialize in media transcoding, but I haven’t been able to find one so far. Instead I use the video editing software Kdenlive, that is built on top of FFmpeg and integrates a very good interface for media encoding.
PureOS, Kdenlive and my Librem 13 is a perfect combination for my free, libre video editing. Gosh, I don’t regret my old Apple/Adobe workstation!
Installing Kdenlive in PureOS or Debian
Kdenlive comes at its latest version on PureOS. If it is not already installed, open up a terminal and type :
You are ready to go!
Single file transcoding
There are several ways to transcode your files with Kdenlive. This first one will let you trim your file or add any effect to it. It is good for the purpose of transcoding a single file to be streamed on the web for example, or transcoding several files manually, one by one.
First of all, you need to open Kdenlive and drop the file you want to transcode in the Project Bin. You may just drag the file from your file manager into it. Kdenlive should display a message asking you to switch the project’s settings to match your file size and framerate. Just click “Switch”

Then, place this file on your timeline. Make sure that the clip is positioned at the beginning of the timeline. At this point, you may trim your clip or add any effect to it.
Click the “Render” button that is positioned on the top toolbar. You may also go to Project->Render.
![]()
The rendering window will appear.
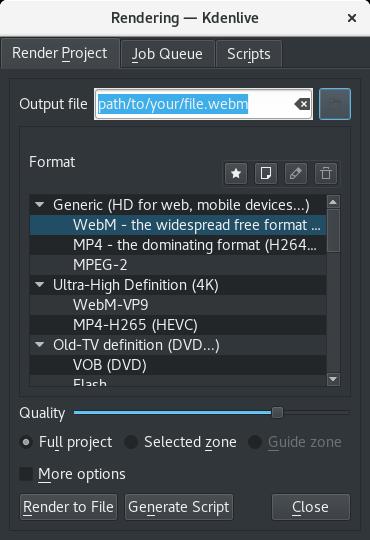
The easiest way to encode is to :
- choose a destination and name for your output file;
- choose a predefined output format;
- make sure that “Full project” is selected;
- click “Render to File”.
You may also get access to more advanced settings by checking “More options”
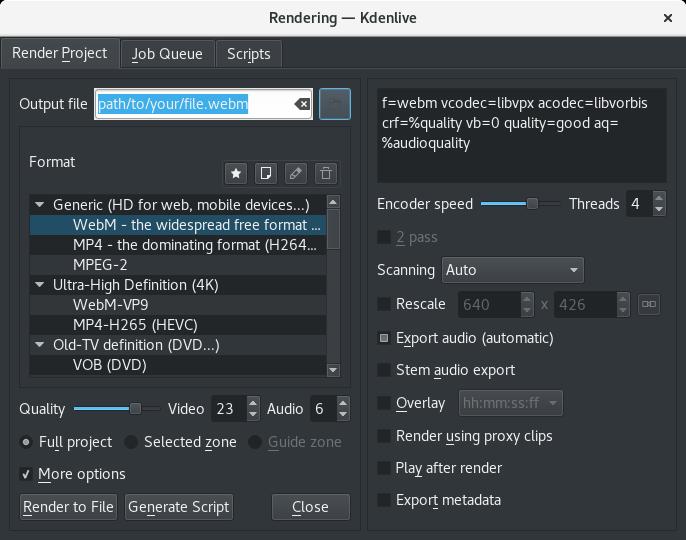
There you can specify your own FFmpeg settings as well as rescaling the output. Note that the parameters in this windows are based on MLT which is a multimedia framework built on top of FFmpeg, so the syntax may differ a bit from FFmpeg. Here is the MLT documentation.
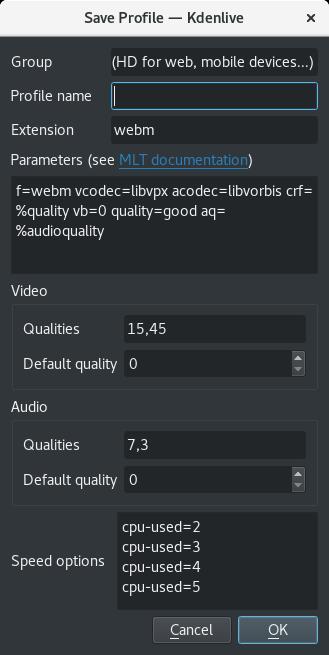
If you wish to add your own encoding profile to the list, just click on the “Create new profile” icon. A new dialog will appear with the settings of the current selected profile. Just update it and save it. You will then be able to select it from the list any time.
Multiple files transcoding
This time we will see an easy way to transcode multiple files at once. It can also work for a single file but won’t give you the ability to trim it.
Move all the files you wish to transcode to the Kedenlive Project Bin.
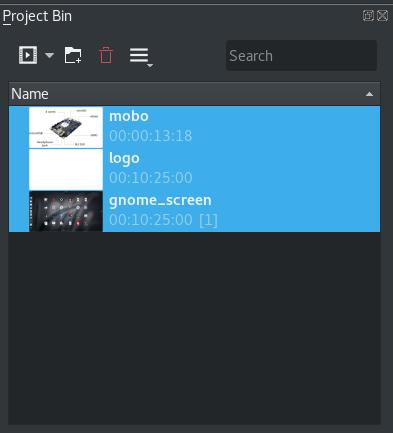
Select them all and right click on one of them. Select “Transcode” and choose the desired format here.
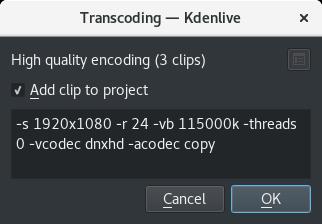
A popup will appear, giving you some options. Click OK. The transcoded files should be created in the same folder as the original ones.
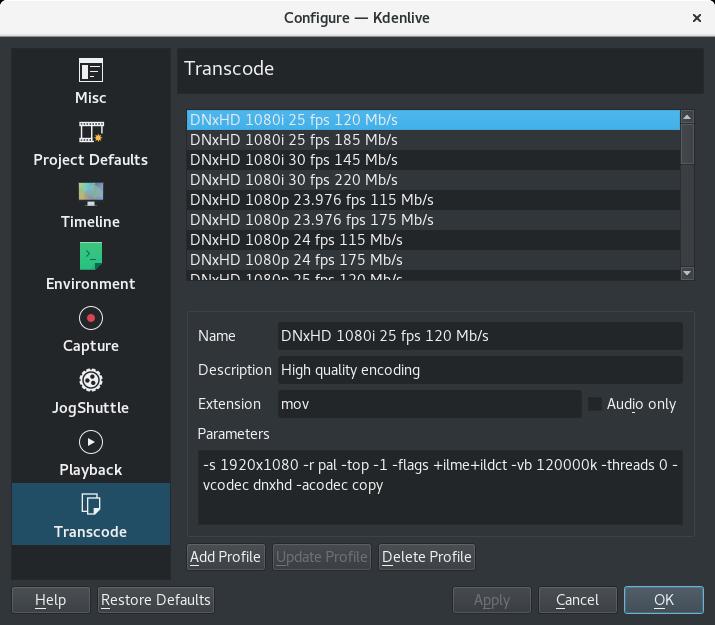
If you wish to add your own profile to the list, go to “Settings”->”Configure Kdenlive…”. There, select the “Transcode” tab.
Selecting an existing profile will pre-load the fields. Modify the properties, give it a name and click “Add Profile”. You will then find your new profile in the “Transcode” submenu.
Conclusion
You may have noticed that the profile lists are different if you choose the first or second method. This is part of a traditional post production worflow.
Generally, the first method, which is rendering your timeline is used for the final rendering of your project. This final rendering may be sent to additional processing like VFX or color grading. It may also just be the final output ready for delivery (broadcast, web streaming etc…)
The second method is used to store your footage into high quality (lossless) video files to be used as the reference, highest quality video files during the editing. While the editing itself may be done using much smaller lighter “proxy” files, the final rendering should be based on these high quality files.
I will describe in details the formats (all free) that I use in every step of my post production workflow. Stay tuned! 🙂
feedback(at)wp.puri.sm
Recent Posts
Related Content
- Google’s Lock Down Policy
- Privacy Under Siege: Why Purism’s User Sovereignty Model is the Way Forward
- Landfall: A Case Study in Commercial Spyware
- Purism Approach vs. Google Model
- Spotify “Panama” Leak Is a Wake-Up Call for Digital Privacy

