
Librem 5 Photo Processing Tutorial
Sebastian Krzyszkowiak
PGP ID: 0xE8F235CF3BDBC3FF
Fingerprint: 22DD 9FAE 006A 1143 5836 617C E8F2 35CF 3BDB C3FF
Librem Social
Latest posts by Sebastian Krzyszkowiak (see all)
- Librem 5 Photo Processing Tutorial - March 2, 2022
- What is Mobile PureOS? - February 24, 2020
During the last year, it has become possible to take some pretty good-looking high resolution photos with the Librem 5:
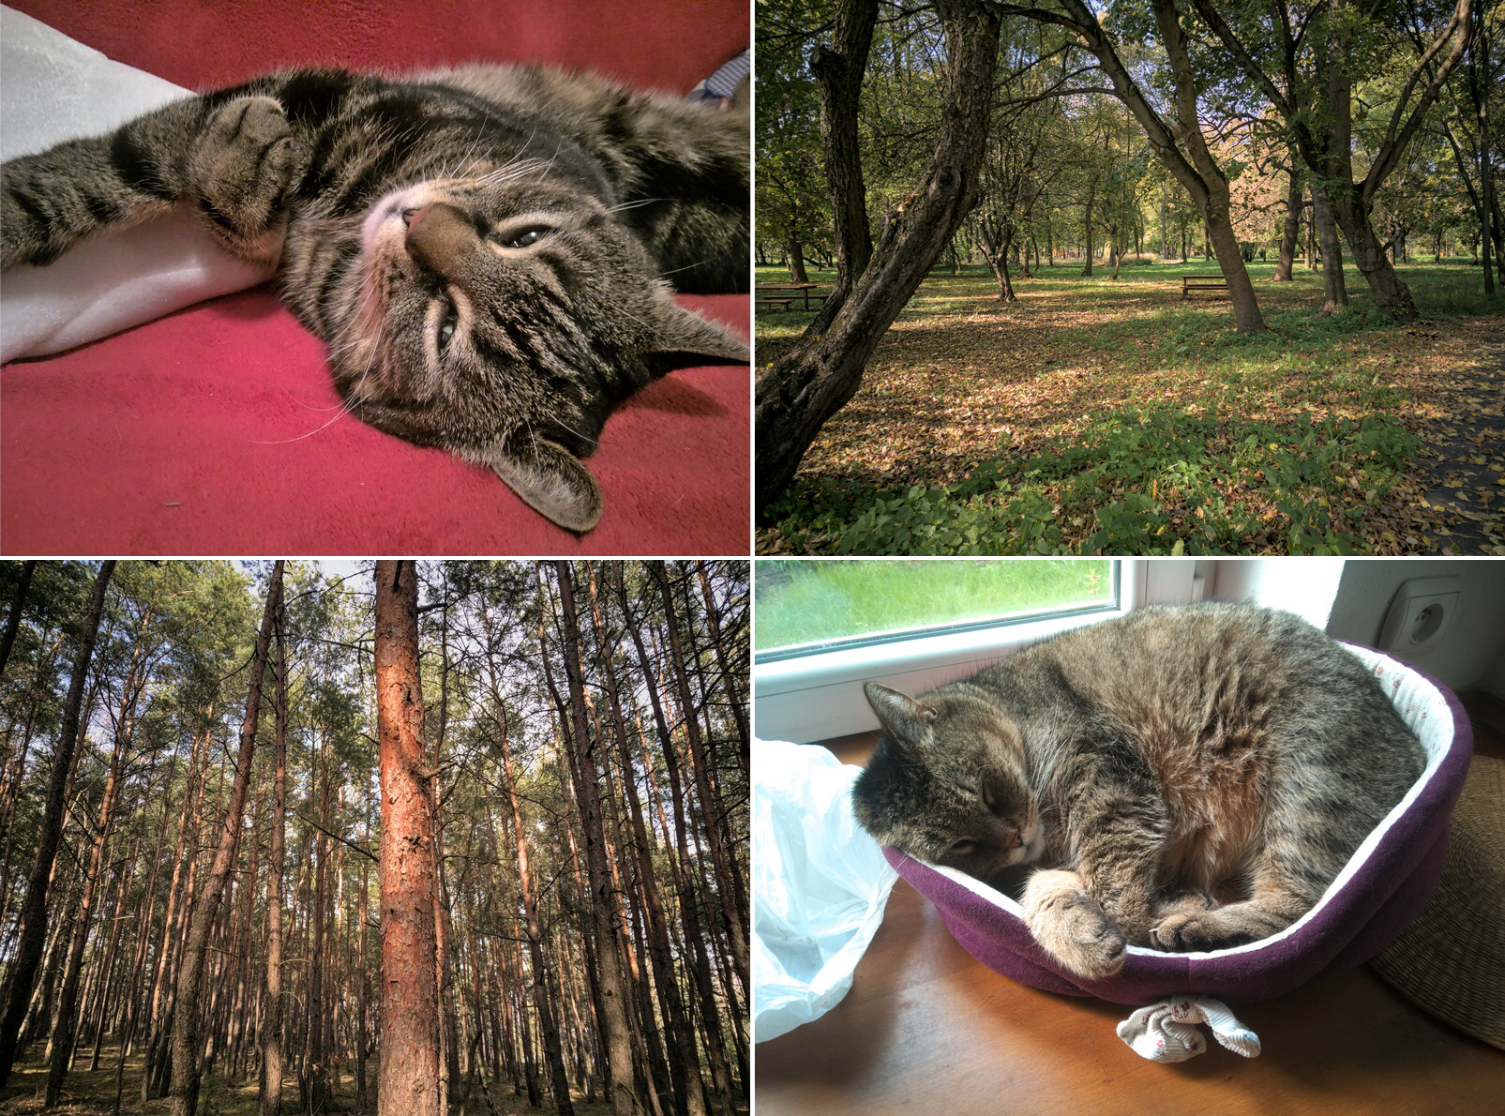
Both cameras can be already used to take stunning photos, and the driver for the front camera is even already upstreamed into mainline Linux. The processing pipeline is, however, rather limited at this point. The user has to manually set the gain, exposure and focus knobs before taking the photo, and there are no heuristics that could analyze the image and decide how to proceed with processing to make it look best.
That’s because smartphone cameras work in a different way than a typical computer webcam does – while a webcam usually provides already developed RGB or even JPEG data, high quality cameras offer mostly raw information coming from millions of tiny light sensors. That raw data needs to be interpreted and processed in order to create an image that makes sense for a human. This calls for software infrastructure that, in the Free Software world, is still in its early days. This also means that applications that can use your laptop’s camera do not necessarily know how to deal with the camera on your phone.
On the Librem 5 we’re also facing additional difficulty, as the Image Signal Processor capabilities of the i.MX 8M Quad SoC that we use are limited. We can use it to gather real-time statistics about captured image in an optimized fashion, but we can’t offload any actual processing like it’s usually done on other mobile platforms and have to implement it in software using CPU and/or GPU instead.
The current long-term plan is to utilize libcamera so that everything mentioned in this post (and more) can happen automatically, but that needs more work across the whole stack to become possible so it’s still going to take some time until that’s in place. If you’re interested in more details, I recommend watching a discussion panel about camera support on mobile FOSS devices that Dorota and Martin from our team took part in during the last FOSDEM. Example photo developed with no manual processing
Developing the raw picture automatically is currently done via dcraw tool, which in my experience can provide excellent results for some kind of photos, but can also come up with rather underwhelming pictures for other kinds. Nothing’s lost though – we can still take the raw DNG file and develop it manually, which is what I’ve done for most of my photos posted on the fediverse and what I’d like to demonstrate in this post.
DISCLAIMER: My knowledge about photo processing is rather limited and can be best summed up with “I’ve just been moving some sliders until I liked what I saw”. This tutorial is only meant to show how I managed to develop my photos so others can replicate my experience and it’s not to be taken as a knowledge source on photo processing.
It’s worth noting that all tools presented in this post are available in the PureOS repository and therefore can be used on the Librem 5 itself!
Taking photos
Let’s start with the camera app: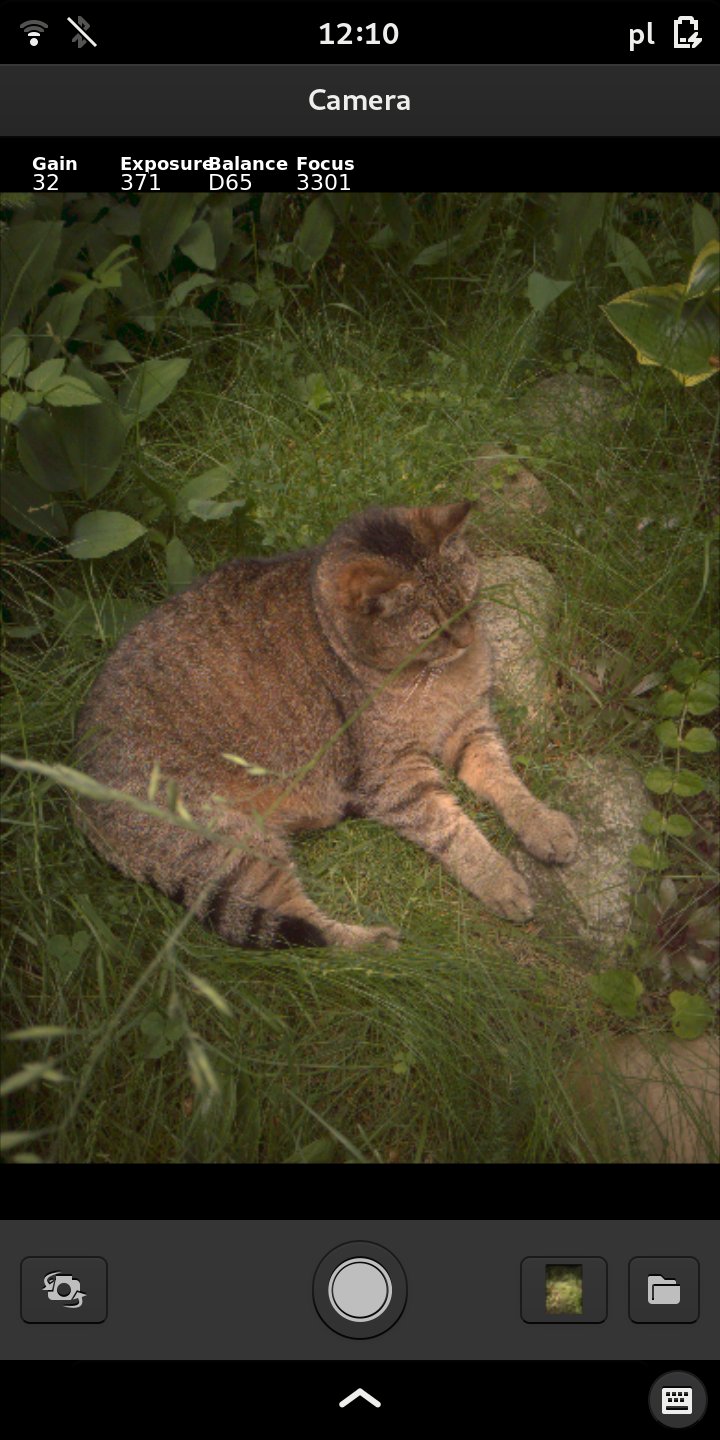
After tapping one of the indicators at the top (gain, exposure, balance, focus), a slider appears that allows to adjust the selected parameter.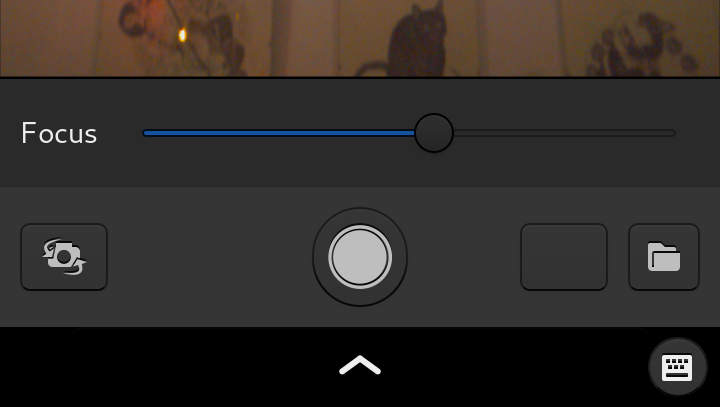 Balance can be losslessly adjusted afterwards, so getting it right isn’t necessary at shooting time – however, this isn’t the case for other controls.
If we shoot a photo with too much gain (ISO) or too long exposure time, it’s going to be overexposed (with irrecoverably burned out too bright areas). If it’s too low, it’s going to quickly lose details, as limited digital color depth will make banding very apparent when trying to brighten it up afterwards. Using high gain, however, makes the image noisy, so when photographing static objects it may be a good idea to try cranking exposure up instead – at a risk that it may more easily catch some motion blur from shaky hands. In low light conditions it may even be necessary to turn them both up to eleven.
The last one – focus (only applicable to the rear camera since the front one has a fixed-focus lens) – usually takes the longest to set, but it’s worth spending some time with it, as getting the depth of field right is the key for shooting nicely looking sharp photos. The slider goes from the nearest (macro) on the left, to the farthest (infinity) on the right.
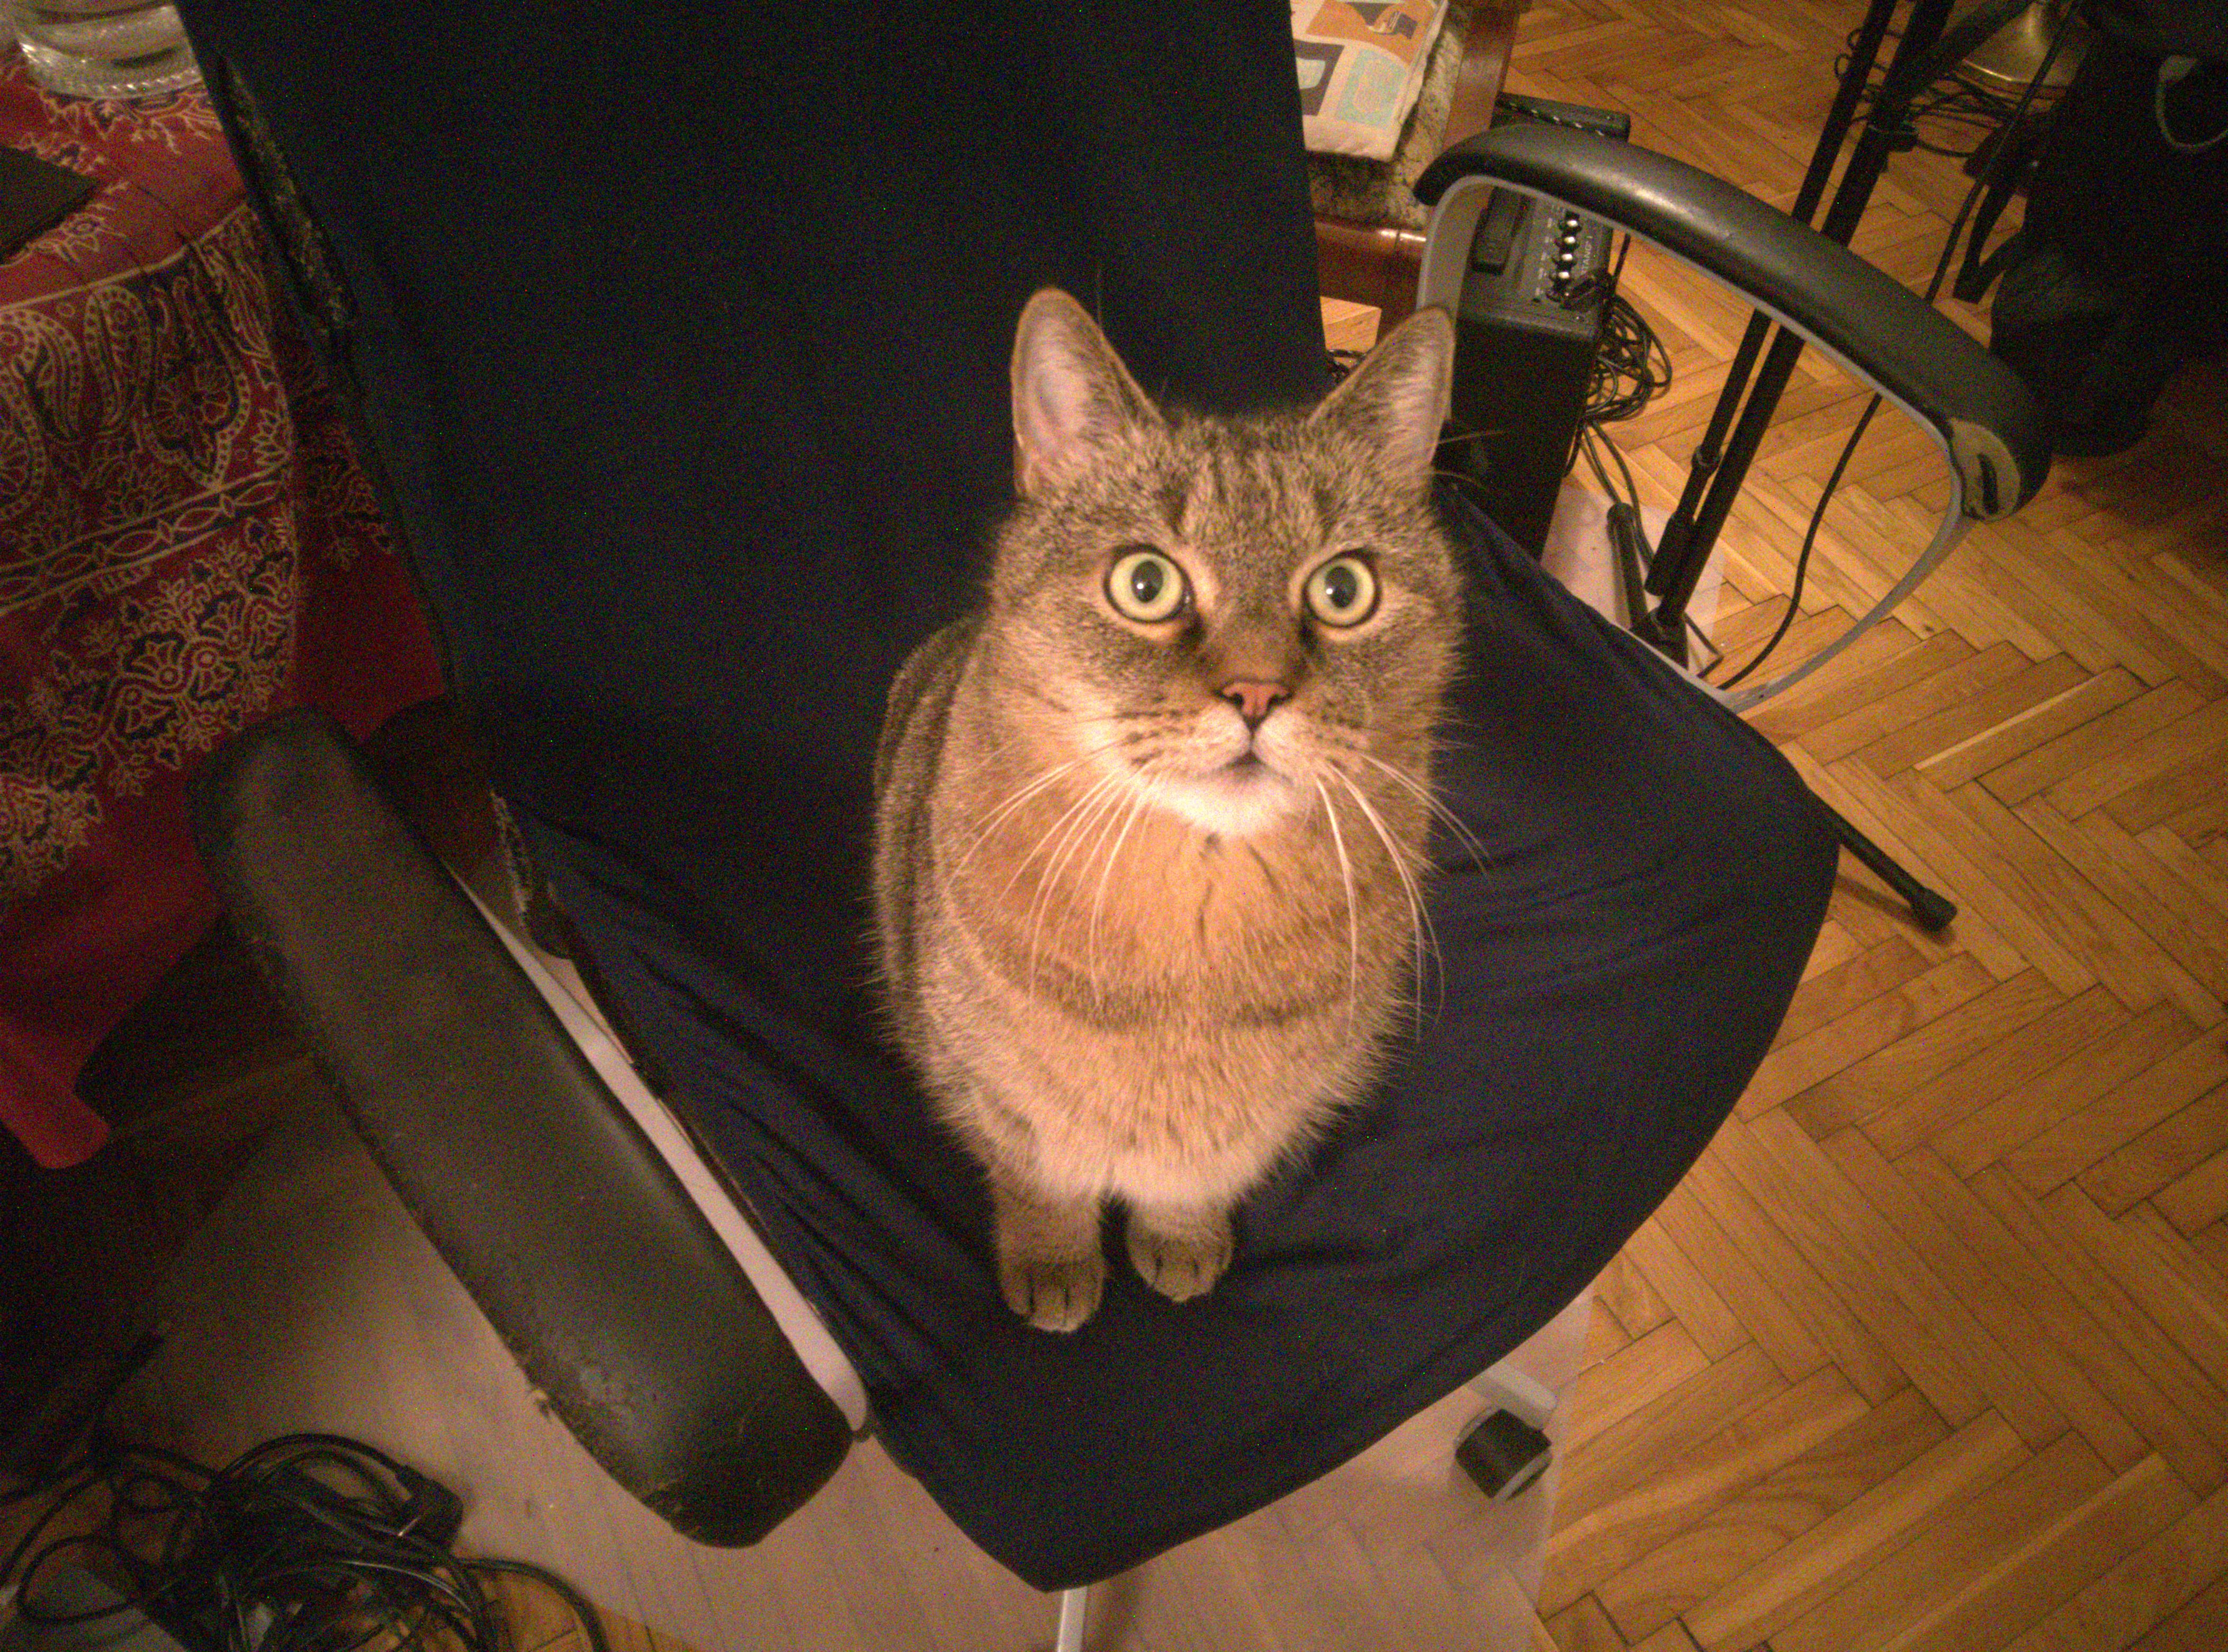
So, armed with the knowledge of how the camera app works, we now took a photo of this little furry chair thief:
 Click/tap to see in full resolution
Well, it’s not exactly the best photo we could take… but that’s how it looks straight out of the camera app. It was taken in a rather low light condition and doesn’t look that great with noise all around (which is especially visible when zoomed in). Focus and white balance aren’t perfect either. However, not all is lost – we can still try to make it look a bit better.
dcraw
The camera app currently uses a dcraw incantation similar to the following one to turn the raw data it gets straight from the camera and stores in a DNG file into a photo stored in a familiar JPEG format (see the script at /usr/share/milipixels/postprocess.sh that actually calls it):
# -w            Use camera white balance
# +M            use embedded color matrix
# -H 2          Recover highlights by blending them
# -o 1          Output in sRGB colorspace
# -f            Interpolate RGGB as four colors
dcraw -w +M -H 2 -o 1 -f file.dng
But what is that raw data? Turns out that camera pixels don’t really work like screen pixels, where each point on the screen contains three color values – red, green and blue – that blend together into a single color. When it comes to cameras, their pixels can actually be either red, green or blue, and are usually arranged in a Bayer matrix. This means that the missing colors need to be interpolated from their neighboring pixels. Raw Bayer Feline Eye
However, that’s not the whole story. If we just interpolate colors (doing so-called debayering), we end up with an image that’s way too green: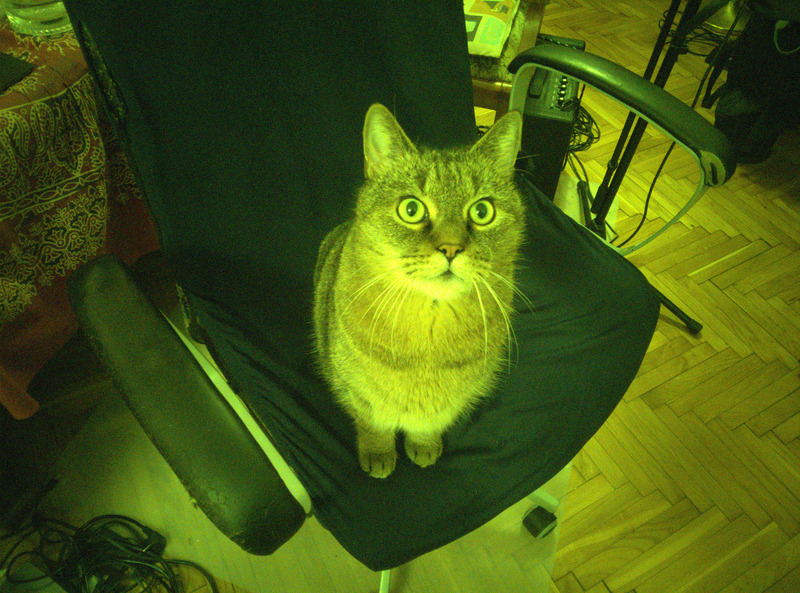 This actually makes sense, because green pixels are also much more sensitive to light than others to match human perception, as our eyes are also the most sensitive to greens. This is also why the Bayer matrix has twice as many green pixels as red or blue ones, since spatial resolution of the green channel contributes to clarity of the final picture the most. This means that colors have to be white balanced before they start making sense for a human. The DNG metadata contains a calibration matrix that allows to turn that greenish soup into proper colors, assuming that the scene has been illuminated with D65 light which has a temperature that roughly matches 6500K (noon daylight). This may not be true, but since we’ve now got a reference point, we can apply further transformations and get the image balanced to a different light source from there (that’s what the balance slider in the camera app is effectively doing).
We can tinker with white balance values by using these dcraw parameters:
-w                          Use the white balance specified by the camera.
-a                          Calculate the white balance by averaging the entire image.
-A left top width height    Calculate the white balance by averaging a rectangular area.
-r mul0 mul1 mul2 mul3      Specify your own raw white balance.
+M or -M                    Use (or don't use) any color matrix from the camera metadata.
(source: man dcraw)
Another thing to consider are highlights. Since raw color values are so skewed towards greens, blues and reds become oversaturated after balancing much earlier than greens. This in turn can make white areas appear pink if naively white balanced. Most photo developing tools also offer options to deal with overexposed areas by trying to rescue partial information (for instance, when only one channel gets burned out) by calculating luminosity and trying to guess the hue based on surrounding area. With dcraw, we can do it via the -H parameter:
 -H 0   Clip all highlights to solid white.
 -H 1   Leave highlights unclipped in various shades of pink.
 -H 2   Blend clipped and unclipped values together for a gradual fade to white.
 -H 3+  Reconstruct highlights. Low numbers favor whites; high numbers favor colors.
Choosing the best value depends on what kind of highlights are present on the image, so it’s best to do some trial and error to find the best configuration. You can also consult the dcraw man page for more available options.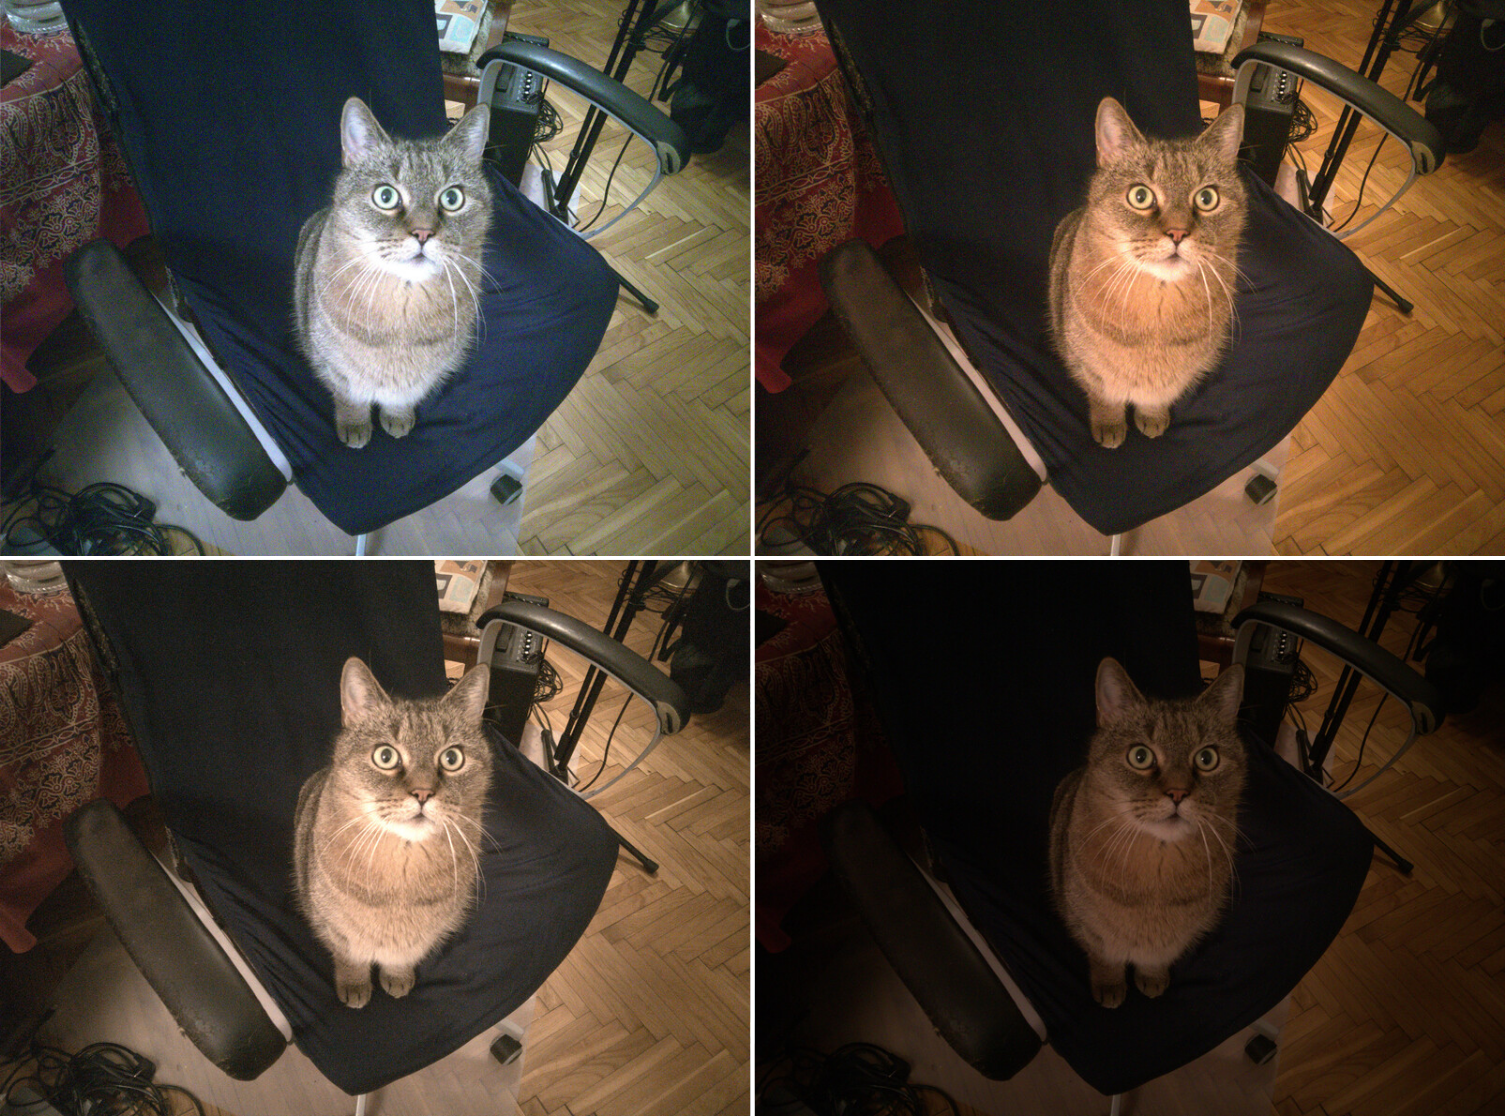 One photo developed with various dcraw options
darktable
There’s still a lot that can be done to improve image quality – noise reduction, hot pixel correction, contrast adjustments… For further manual processing, we’re going to use darktable.
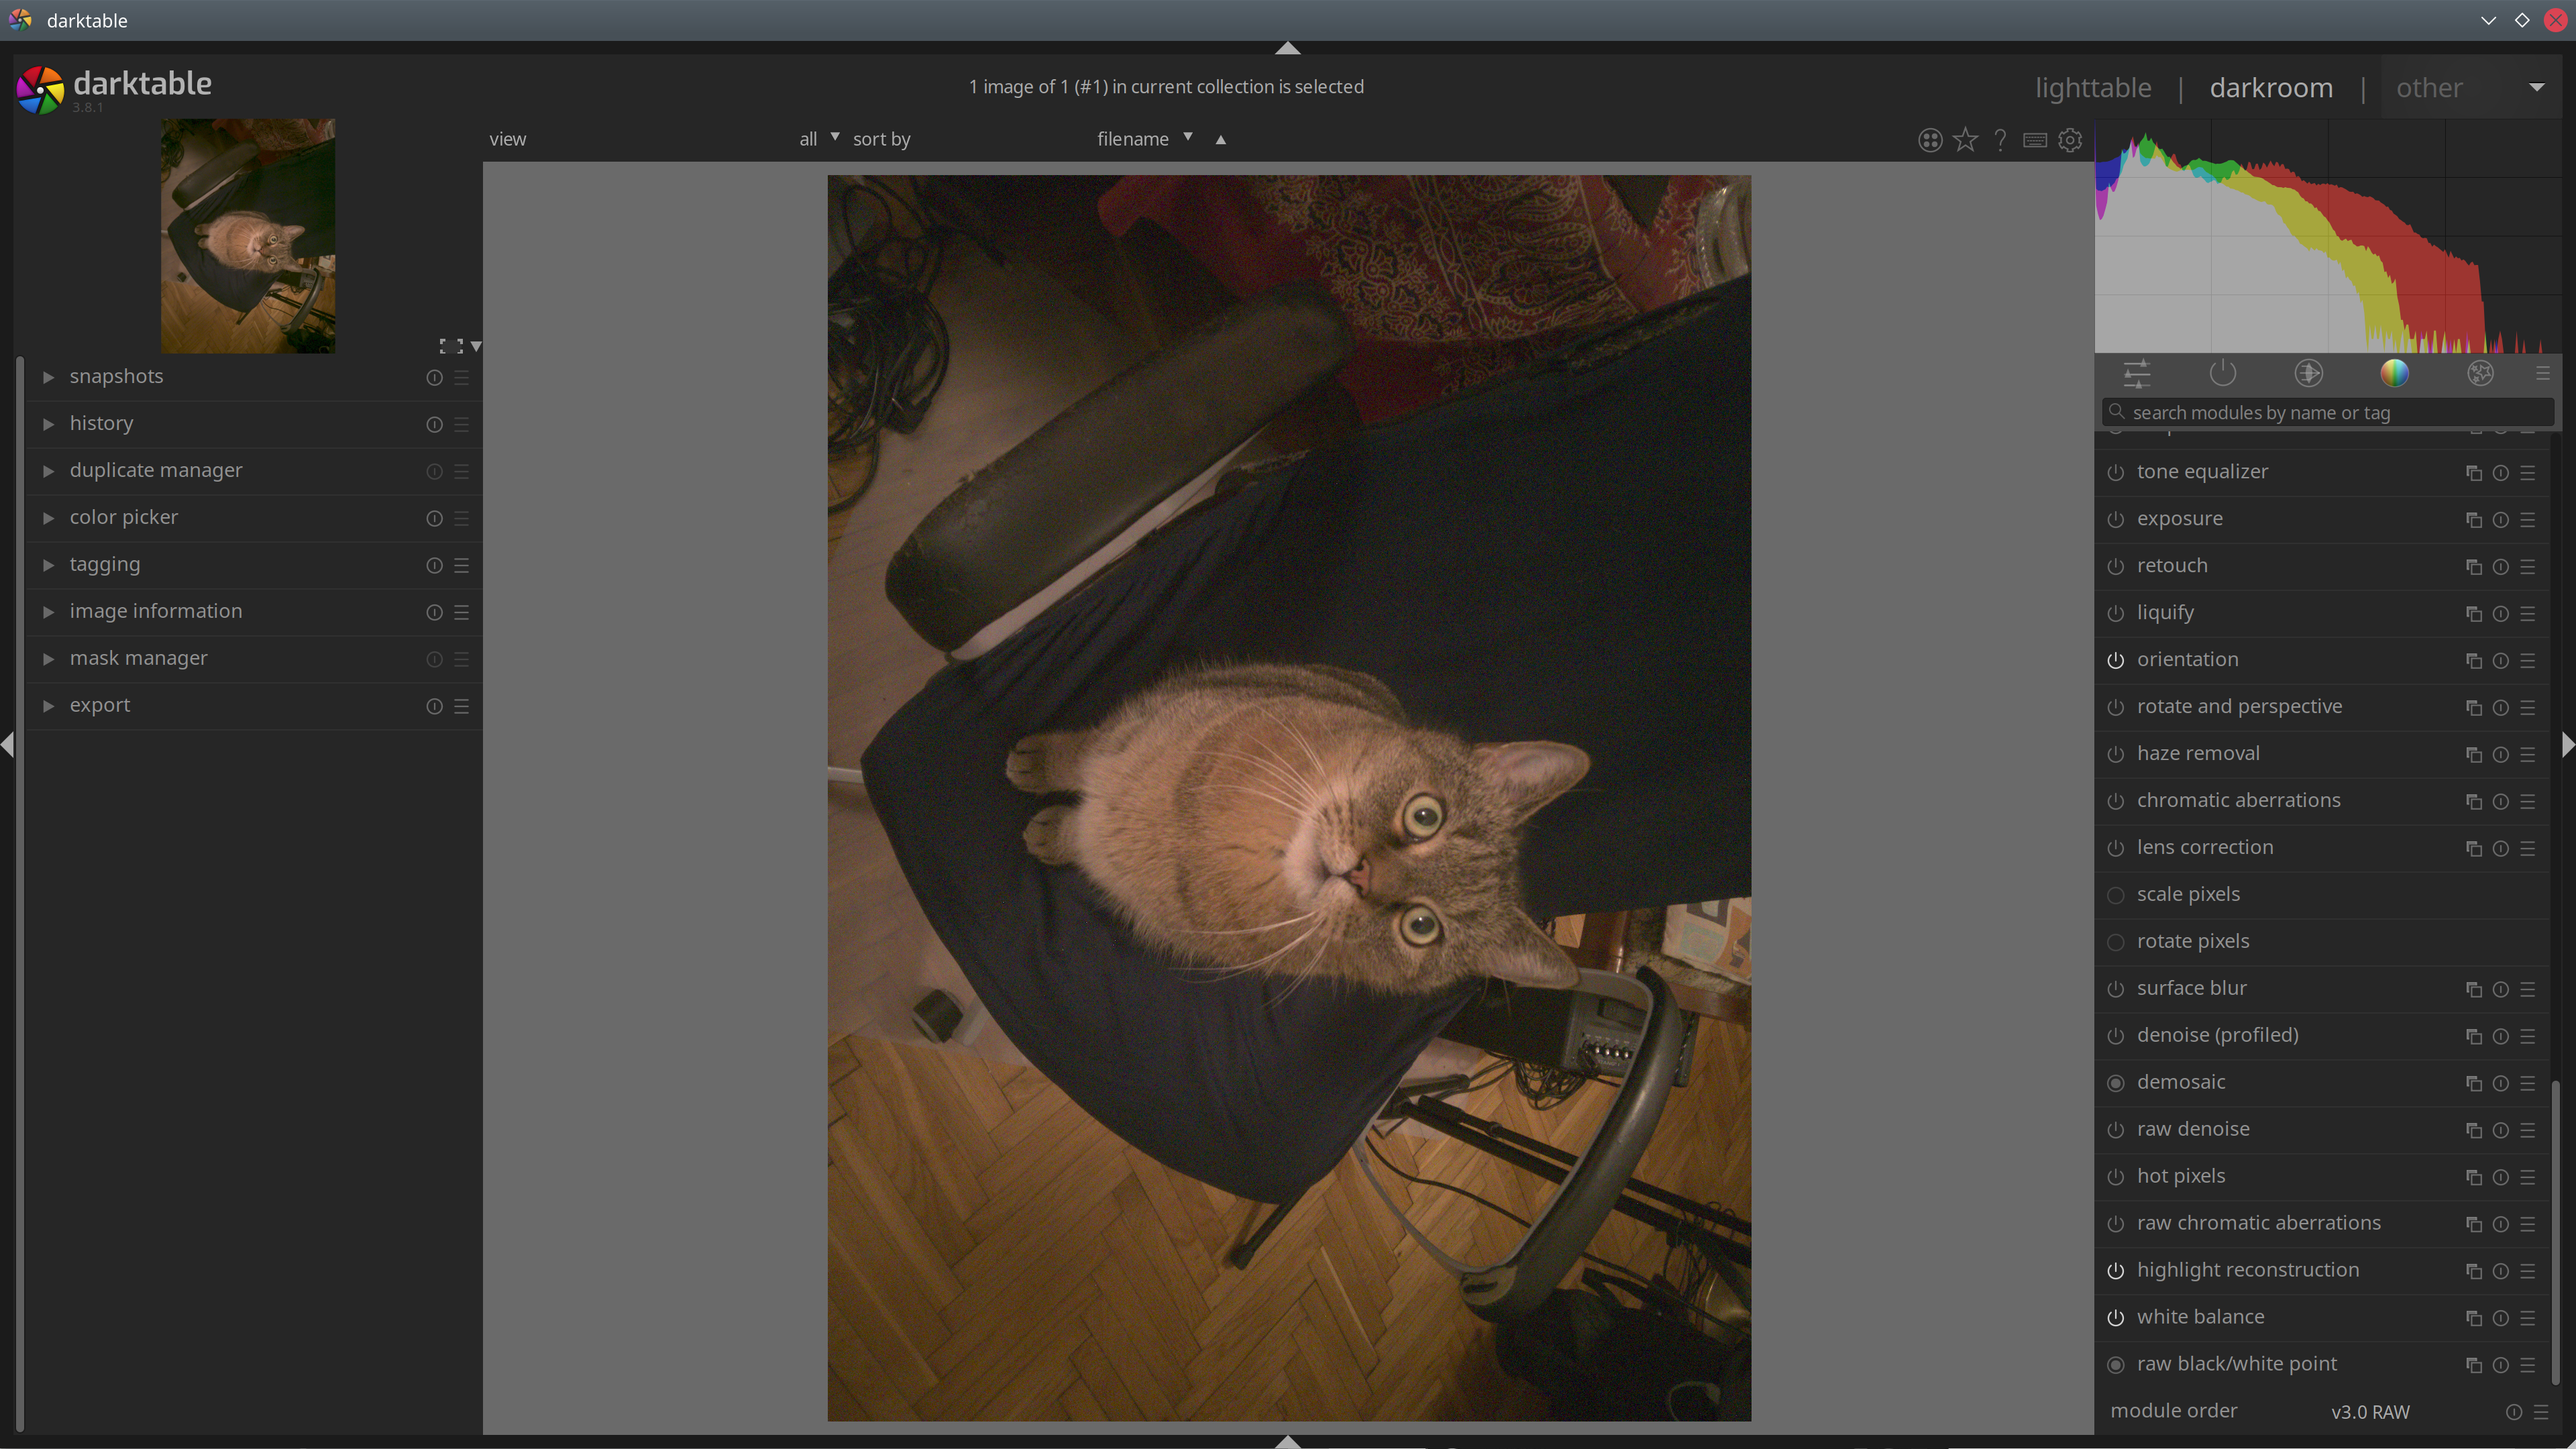 The right side of the screen shows the available processing modules.
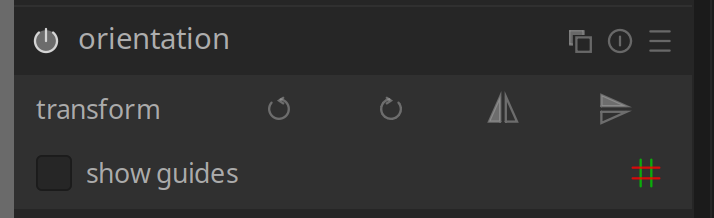
- Start by adjusting the orientation:
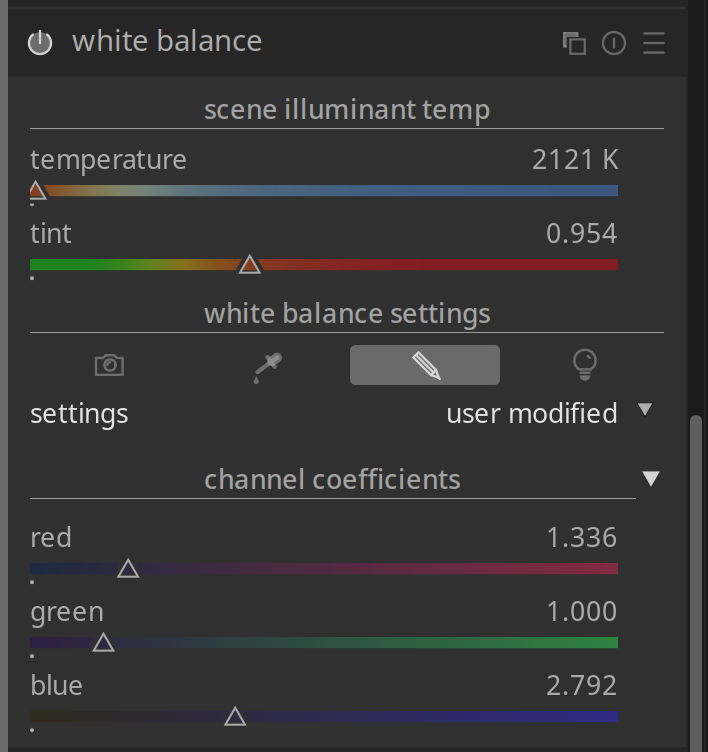
- Adjust white balance. An easy way to get satisfiable results is using settings: from image area and then selecting white or gray areas on the picture (if available). Here we can utilize a gray patch of chair’s handle.
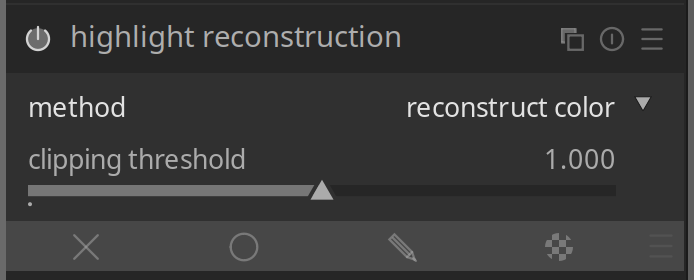
- Highlight reconstruction can be useful when parts of the photo are overexposed, as different methods to recover (or more accurately, guess) lost colors may give better results in different cases. We don’t have any highlights here though, so we can ignore it in this case.
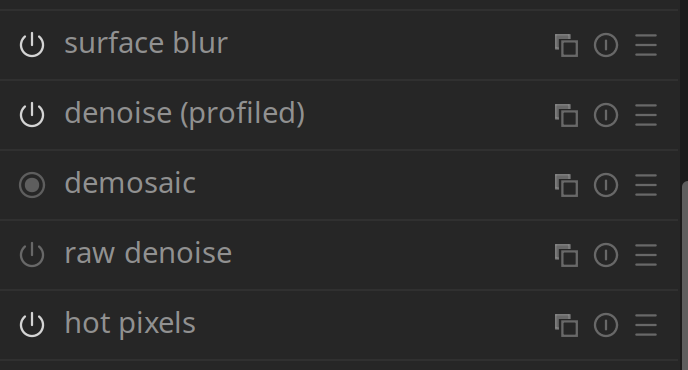
- Adjust hot pixels settings. I usually get the best results with “detect by 3 neighbors” being selected. In this case, I went over-the-top and boosted correction strength a lot, since the photo was very noisy.
![]()
- Use raw denoise, denoise (profiled), surface blur and astrophoto denoise to try to minimize the amount of visible noise. Different pictures will call for different methods, so it’s best to experiment and see what works best without sacrificing too much detail.
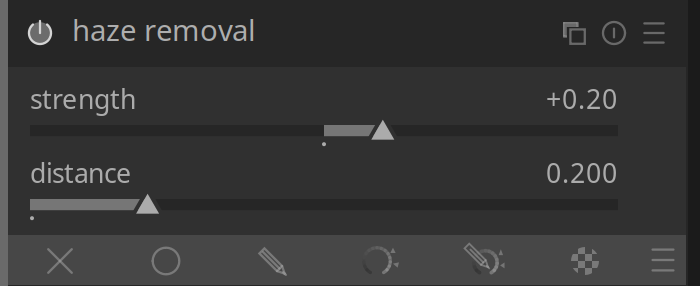
- Check whether haze removal improves the image’s contrast. If you like what you see, leave it on 🙂
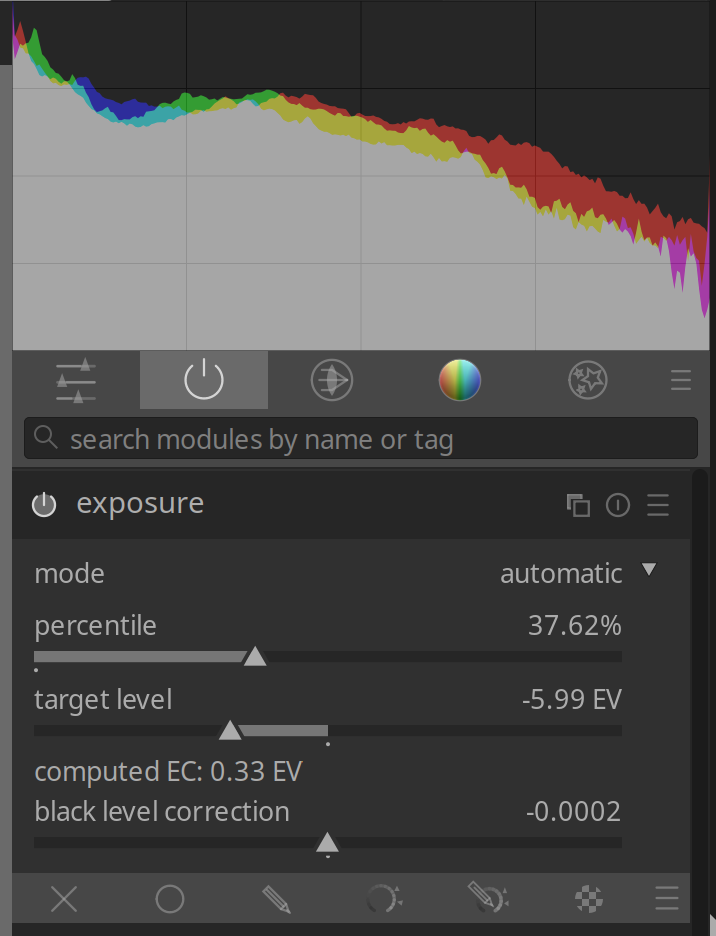
- Use exposure module to adjust image brightness. The histogram that’s shown above the modules can be helpful in determining whether exposure compensation needs to be bumped up or toned down. (don’t use black level correction though, if blacks aren’t black enough we’ll fix that later in a better way)
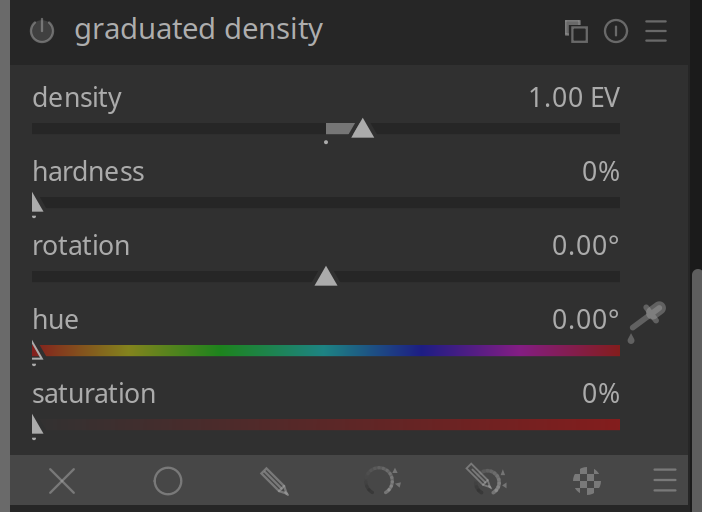
- Graduated density is a great tool for photos where you can see the sky on upper half on the photo. Since sky is usually bright, it tends to be overexposed compared to the things in the foreground, so this module gradually darkens the upper half of the image. It’s not really useful in this case though, so let’s keep it off.
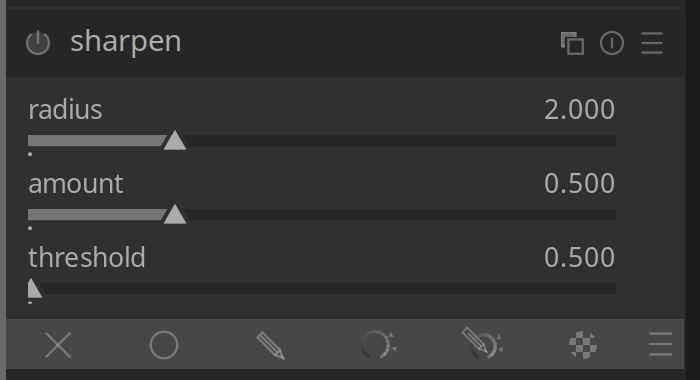
- For some photos, sharpen can make the image… well, sharper. It can also make the noise more visible though.
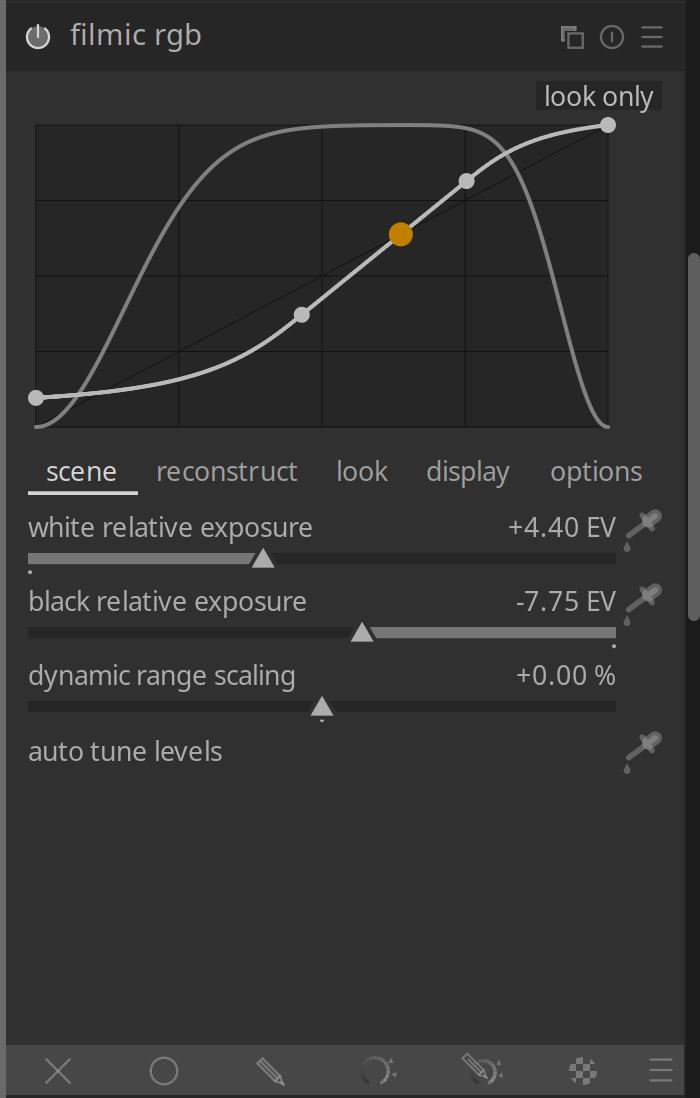
- I tend to get nice results by simply enabling filmic rgb, which makes the image look more contrasty and less washed out.
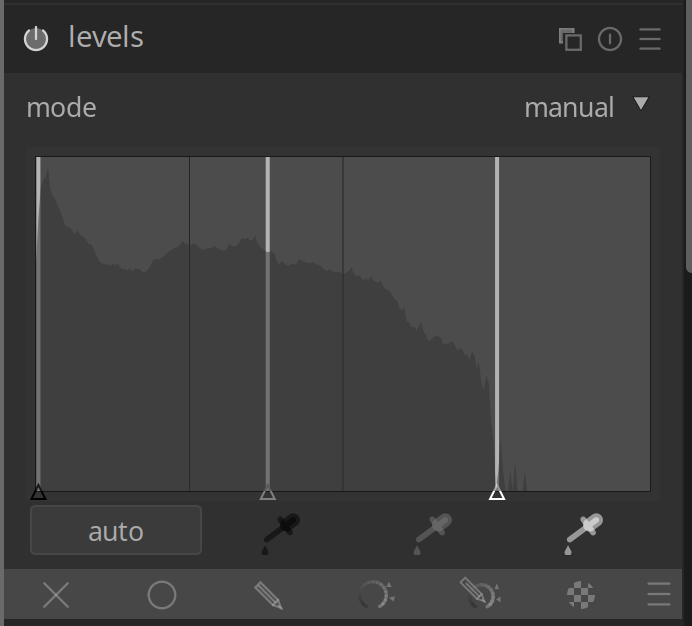
- Levels is a good tool to fix blacks that aren’t black enough or whites that are too gray.
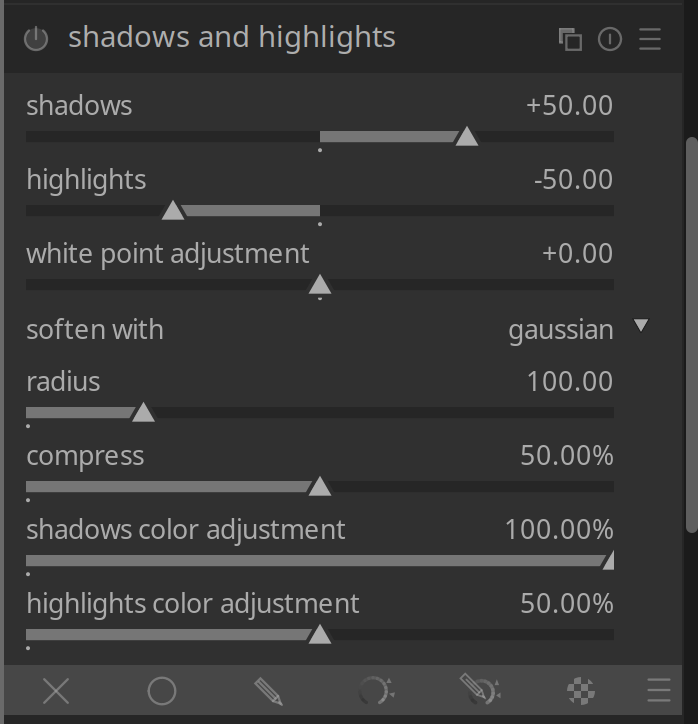
- Shadows and highlights can brighten up overly shadowed areas and make highlights softer, which can look really great especially on well-lit outdoor photos. However, in low-light photos like this one, this tends to boost things that we rather want to hide, so let’s keep it disabled in this case.
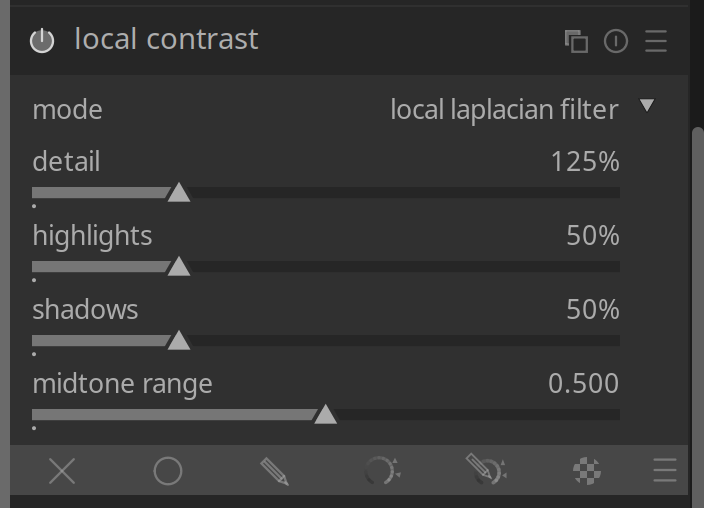
- Use local contrast to make the picture look less washed out.
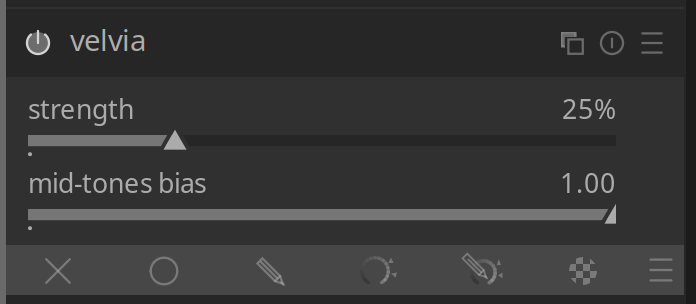
- Velvia resaturates the color in a way that can make them appear more vivid, especially for things like human skin.
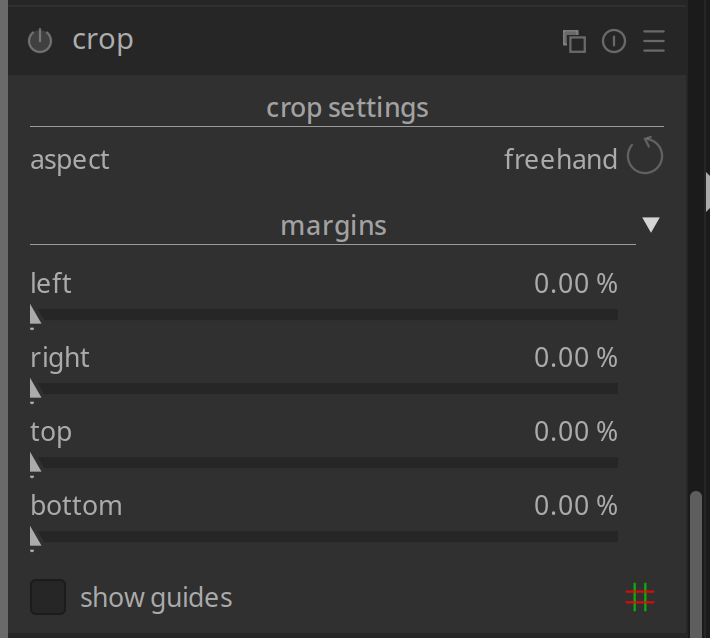
- At the end, crop what’s unwanted out of the photo frame.
Now switch to lighttable option at the top of the screen, select the photo you just edited and use export option to generate a corrected photo.
RawTherapee
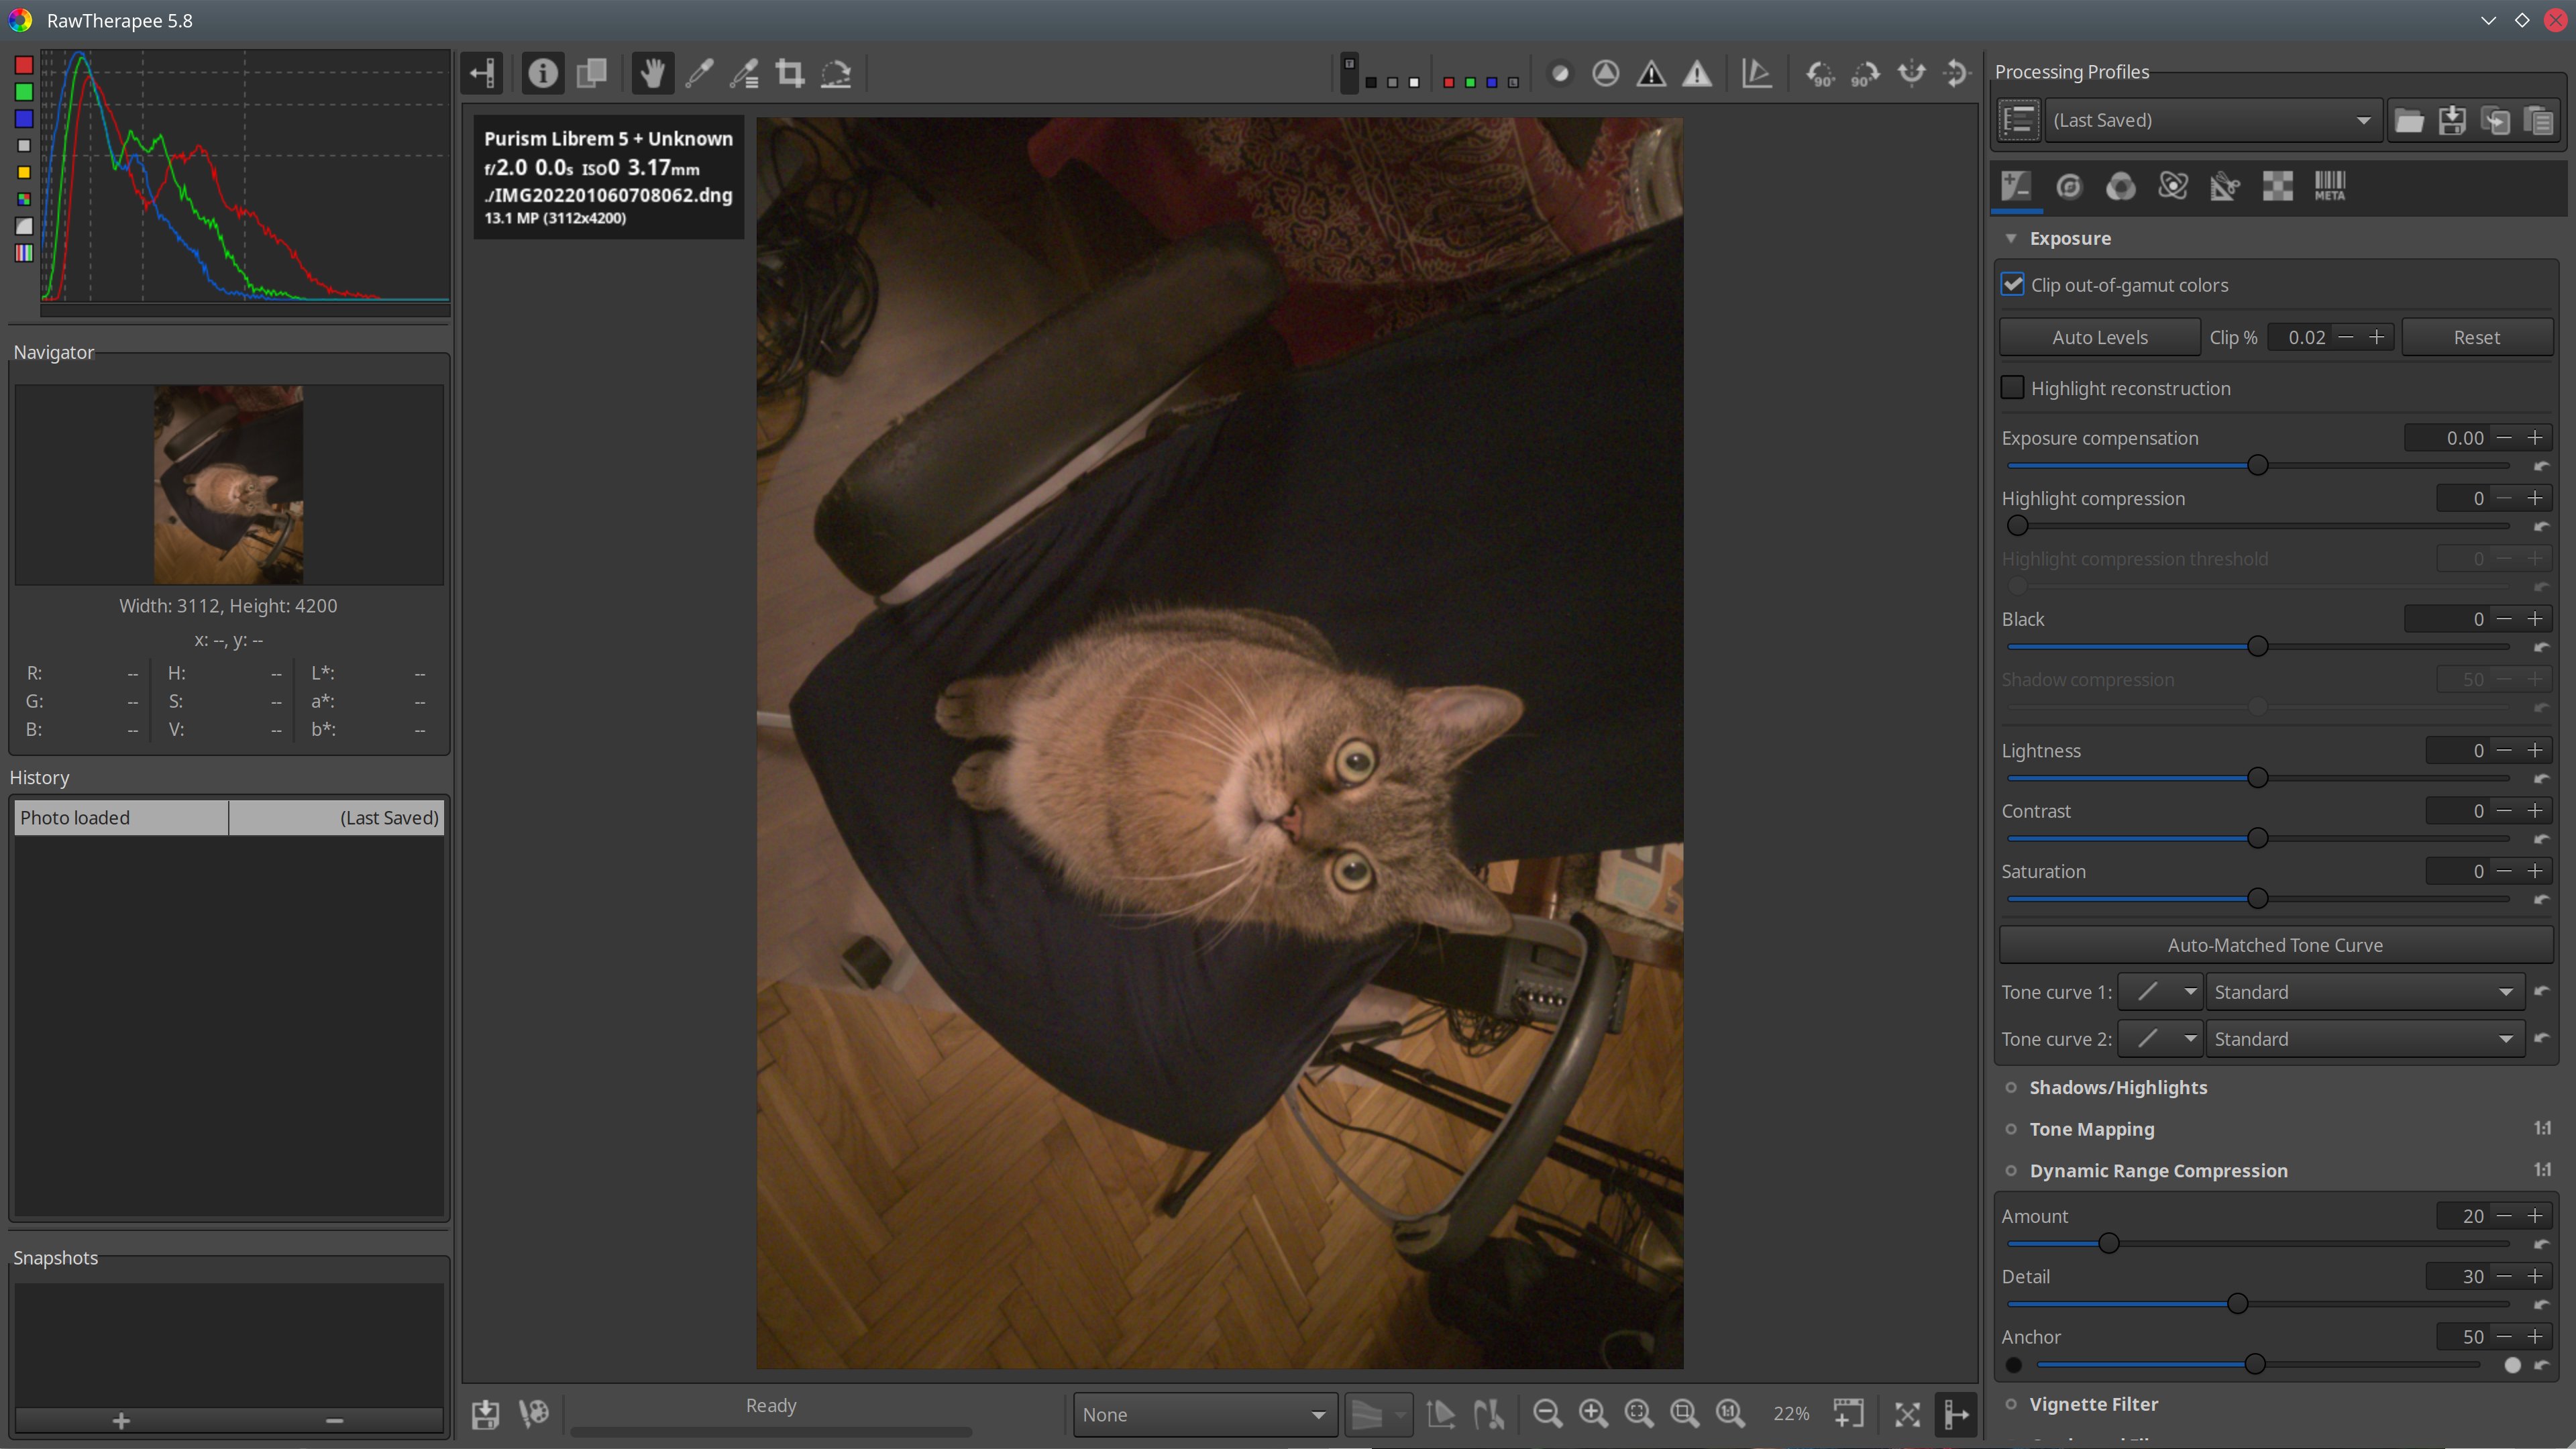 Another application that could be used to develop raw images is RawTherapee. I don’t use it as much as darktable, but I did use it for some of my photos in the past. My typical session usually looked like this:
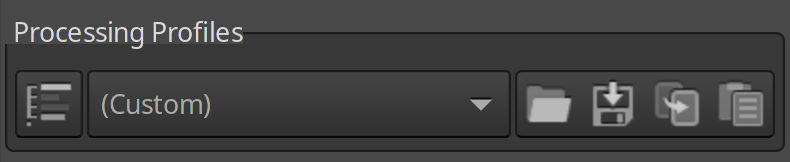
- Start with setting a (Neutral) processing profile.
- Rotate the image with controls on top of the window:

- Enable Hot pixel filter in Preprocessing section; adjust threshold as needed based on the preview.
![]()
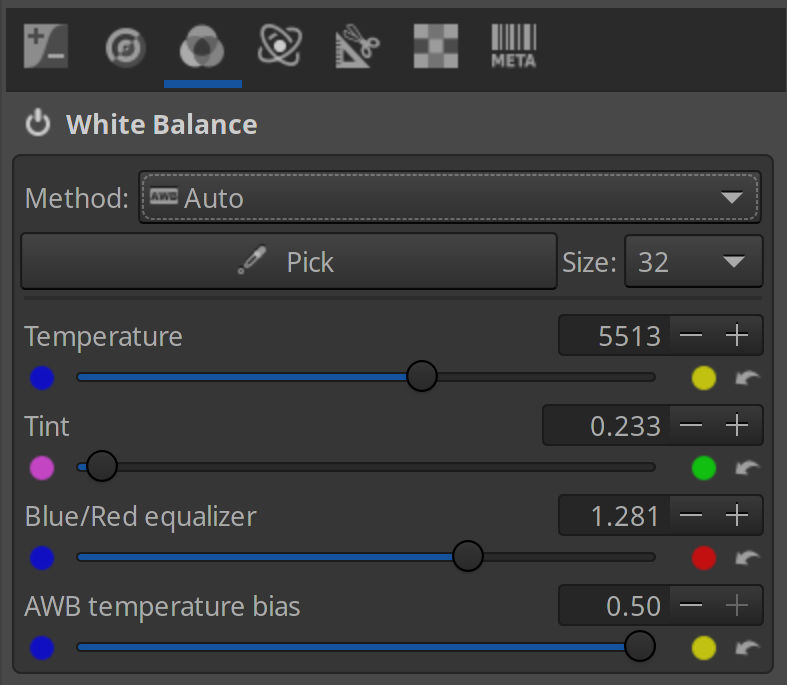
- Set white balance. Auto tends to do a pretty good job, although if there are white objects on the photo, you can click Pick and choose a reference area from the image, which may give better results. You can also adjust Temperature and Tint manually if automatic result isn’t good enough.
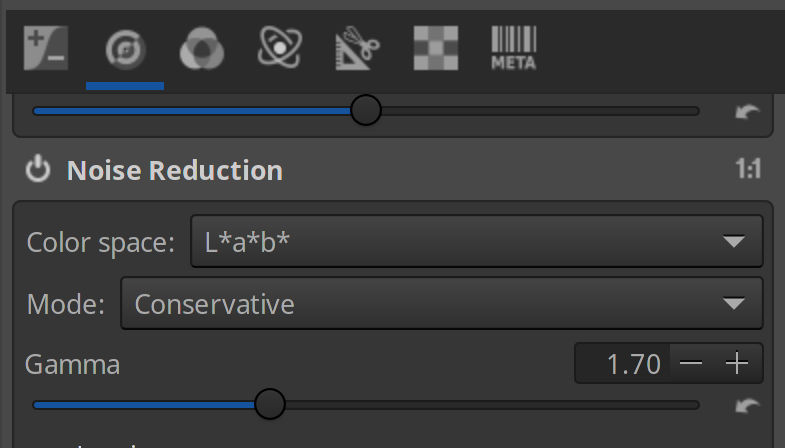
- Enable Noise Reduction if needed – this one helps especially with low light photos. Take note though that you’ll not see a preview of this one until you zoom the photo to 100% or above.
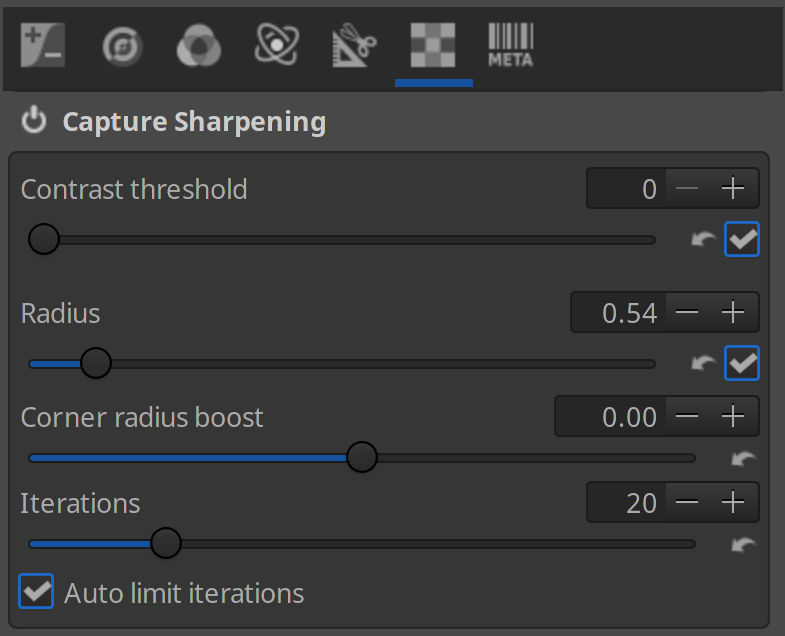
- Enable Capture Sharpening.
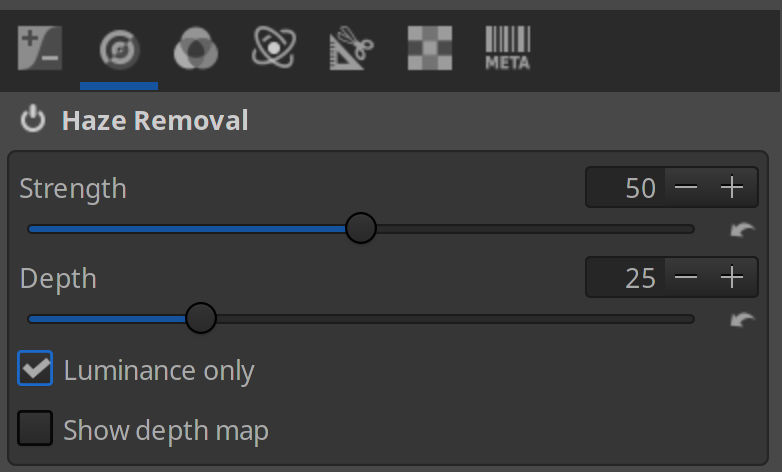
- Depending on the photo, you may want to play with Haze Removal
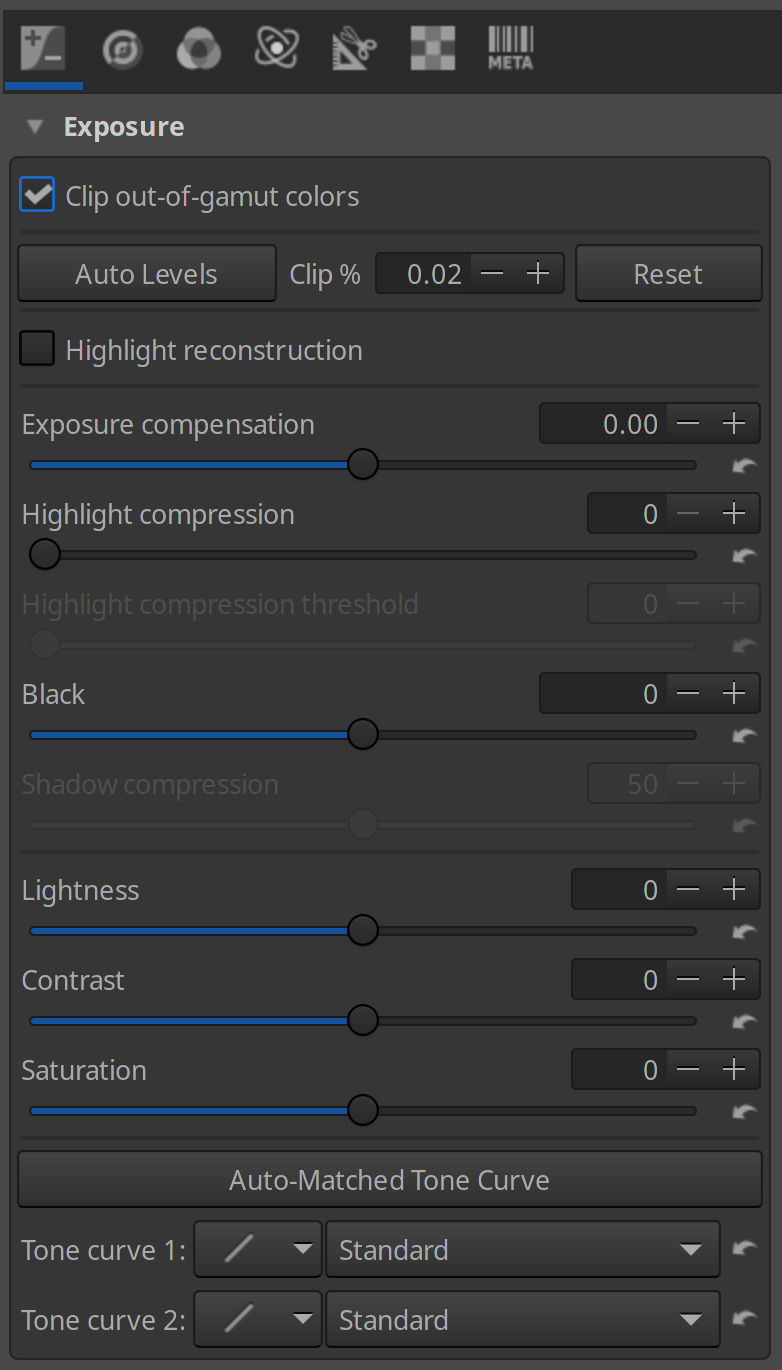
- Adjust Exposure compensation in Exposure section to your liking. I often use Auto Levels, although on noisy photos it can work poorly. Options Clip out-of-gamut colors and Highlight reconstruction are also worth playing with.
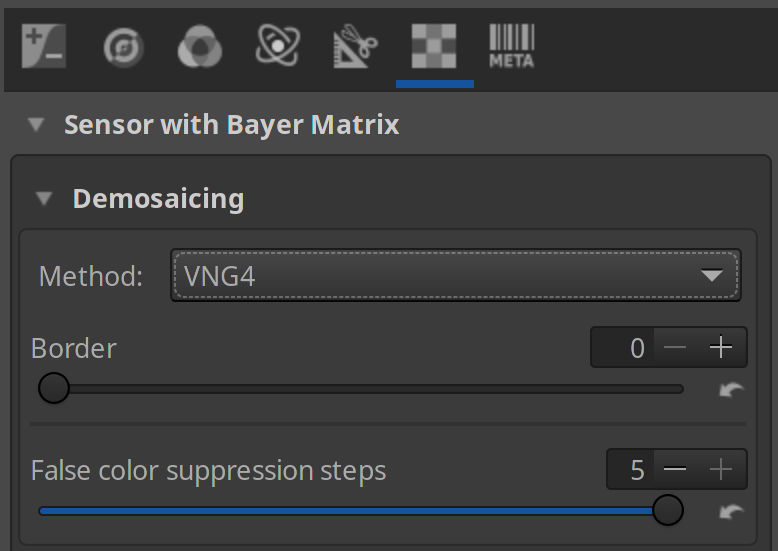
- Sometimes, when zooming in reveals maze-like artifacts, I switch demosaicing method from AMaZE to VNG4.
Bonus part: night mode
We’re still at the beginning of our journey with camera support and there’s bunch of things that our hardware can handle, but there’s still no easy way to actually use them in software. To give an example – the rear camera supports 10-bit pixel depth, but the kernel driver can currently only use 8-bit modes. Same thing applies to exposure time controls, which are pretty simplistic at the moment – the sensor can deal with much longer integration times than what can be currently set with sliders.
However, at least when it comes to exposure time, there is a hacky way to reach this “hidden” functionality already.
echo 0x0342 | sudo tee /sys/kernel/debug/s5k3l6/address
echo 0xff | sudo tee /sys/kernel/debug/s5k3l6/add_value
Execute this snippet before running the camera app to significantly lengthen the exposure time, so you can take pictures that appear brighter than what you actually see with your eyes without too much noise. You will have to try hard not to shake your hands though, or all you’ll end up with will be a blurry mess!
You can experiment with replacing 0xff (255) with lower values, although setting it too low will cause the camera to not work correctly. Set values aren’t applied immediately, but only after restarting the video stream. You can reset this setting to defaults by either rebooting or executing:
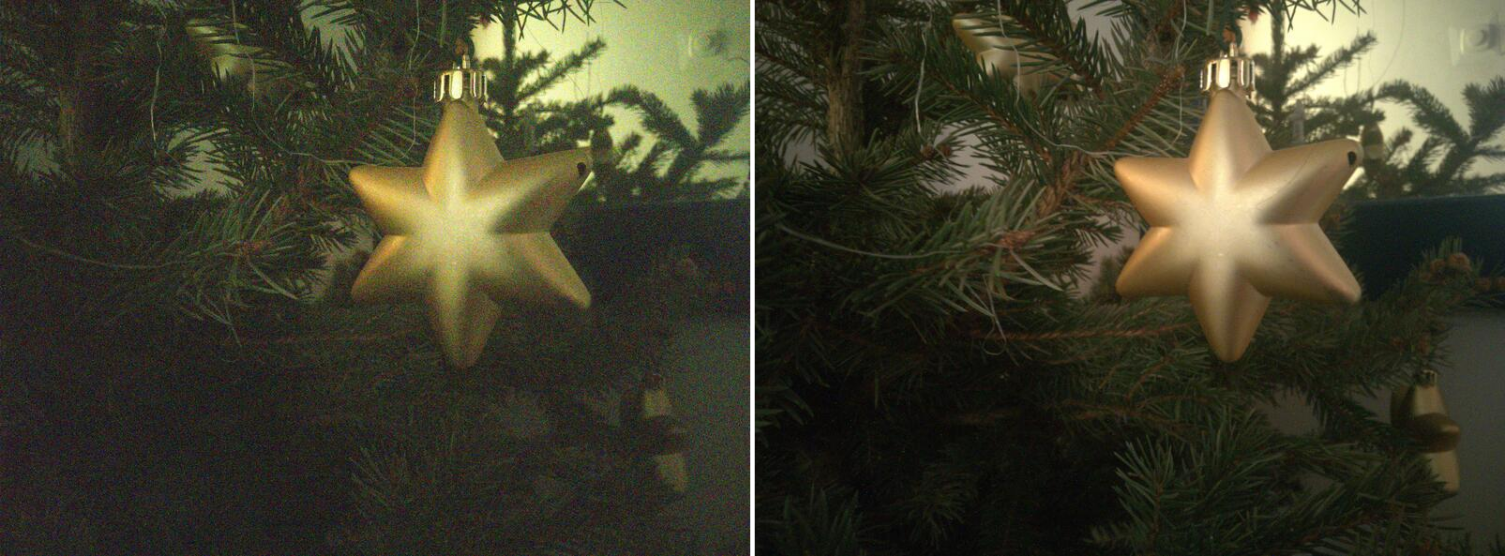
Normal and “night” mode in a dark corner, developed automatically, both with gain and exposure sliders at maximum positions
Meow!
Now that we know how to develop our raw photos we can post them on social media (tagged with #shotonlibrem5) where cat pictures naturally belong!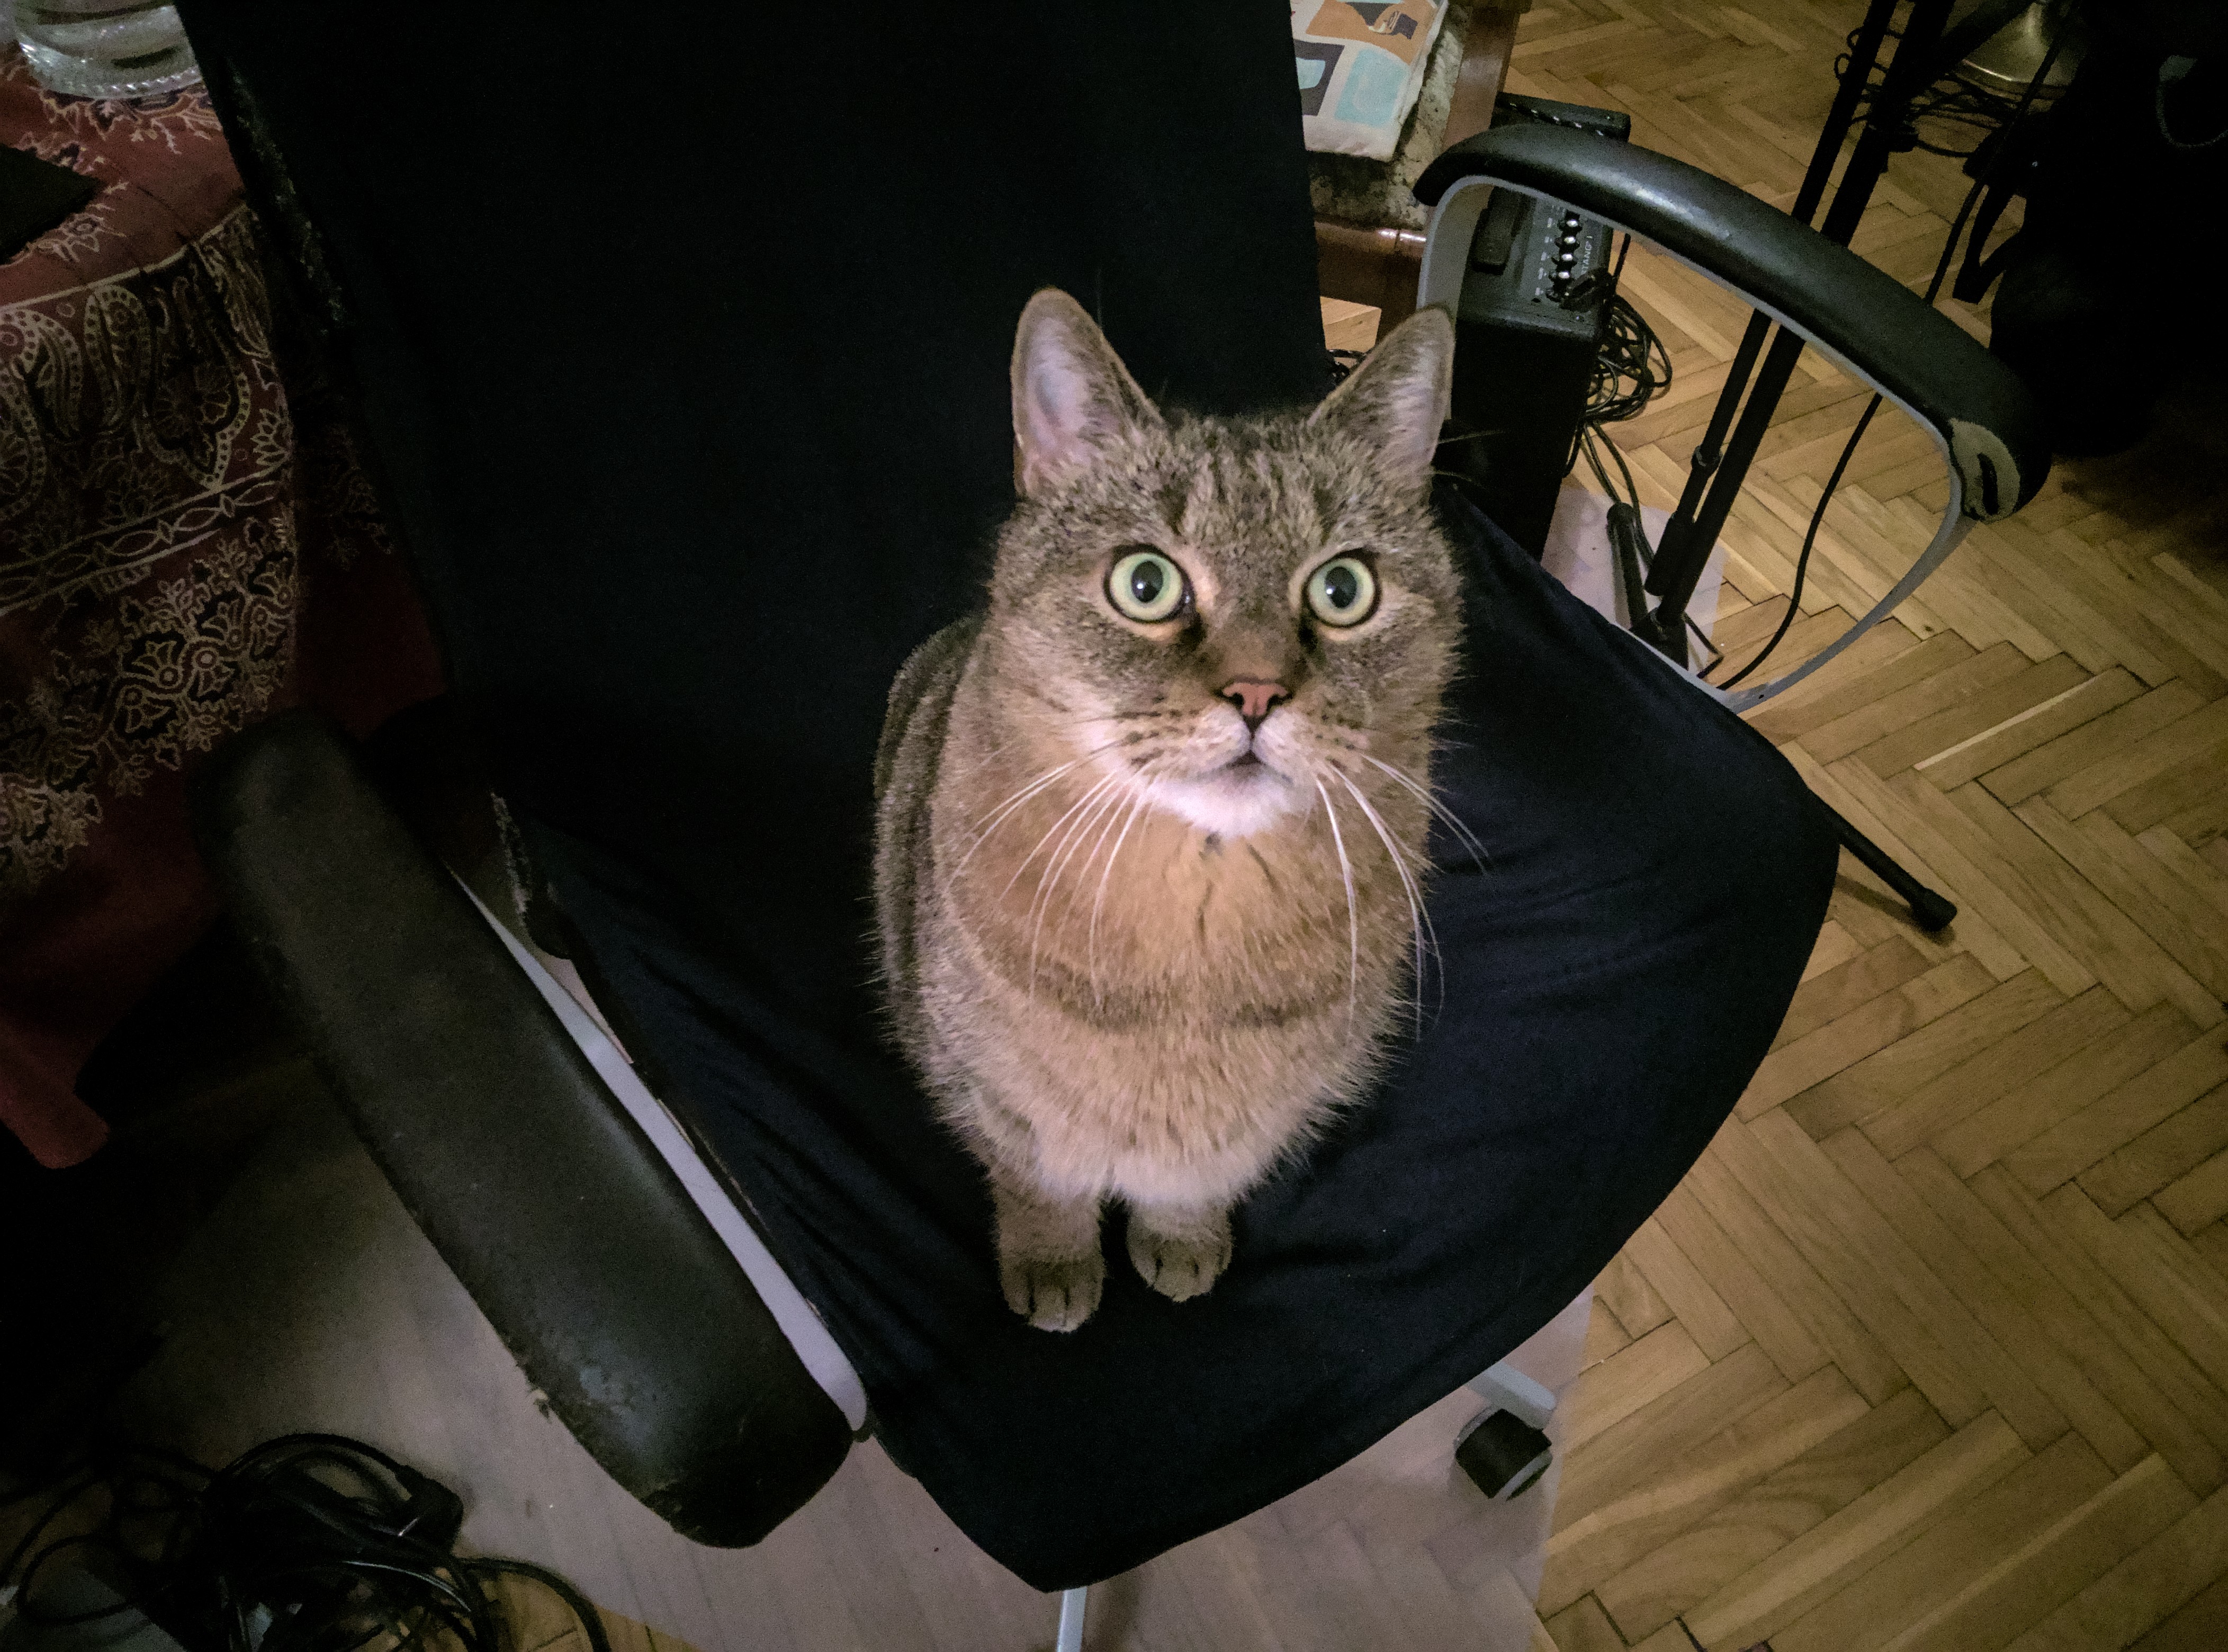 Dyzio trying to convince you that the last time he saw food was about a century ago
Purism Products and Availability Chart
| Model | Status | Lead Time | ||
|---|---|---|---|---|
 | Librem Key (Made in USA) | In Stock ($59+) | 10 business days | |
 | Liberty Phone (Made in USA Electronics) | Available on backorder ($1,999+) 4GB/128GB | n/a | |
| Librem 5 | In Stock ($799+) 3GB/32GB | 10 business days | |
 | Librem 11 | Out of stock | New Version in Development | |
 | Librem 14 | Out of stock | New Version in Development | |
 | Librem Mini | Out of stock | New Version in Development | |
 | Librem Server | In Stock ($2,999+) | 45 business days | |
 | Librem PQC Encryptor | Available Now, contact sales@puri.sm | 90 business days | |
 | Librem PQC Comms Server | Available Now, contact sales@puri.sm | 90 business days |
Recent Posts
Related Content
- Google’s Lock Down Policy
- Smartphone Study
- DHS Inspector General Study
- Privacy Under Siege: Why Purism’s User Sovereignty Model is the Way Forward
- Wired Confirmed iPhone’s Worst-Kept Secret: Closed Systems Fail at Scale

