
Developing for Mobile Linux with Phosh – Part 0: Running Nested

Guido Günther
Latest posts by Guido Günther (see all)
- Opportunistic Word Completion - December 21, 2023
- Developing for Mobile Linux with Phosh – Part 0: Running Nested - February 21, 2023
- Phosh 2022 in Retrospect - January 9, 2023
Mobile Linux is gaining in popularity. What is a simple way to develop for it?
This upcoming series of posts will help with that using Phosh and related technologies. We’ll start out really simple and move into more complicated topics step by step.
For many bits you won’t even need to modify your phone (or even need to have one). A desktop or laptop running Linux with a graphical Wayland session is sufficient.
In this first part we’ll install and run the required components in a (so called) nested session. This will include the Wayland compositor Phoc, the mobile shell Phosh and an application of choice. We use the gtk4-demo for that. This nested session will already use a phone like form factor. As we’ll need it later on we’ll also install the on-screen keyboard Squeekboard.
To keep things simple we won’t even build any of the components from source (yet) but rather rely on distro packaging. Phosh, Phoc and Squeekboard are contained in Debian and Debian based distribution like Debian Bookworm, PureOS Byzantium or Ubuntu Kinetic (other distributions like Fedora or Arch ship phosh as well. Use their respective commands for installing the packaged versions.)
So let’s install these and the gtk4-demo as demo application:
sudo apt install -y phosh phoc squeekboard gtk-4-examples
With these installed we can already launch an application running in phoc. While logged into your usual desktop session open a terminal and run as regular user:
export WLR_BACKENDS=wayland
export GSETTINGS_BACKEND=memory
phoc -C /usr/share/phosh/phoc.ini -E gtk4-demo
This might look a bit scary but no worries we’ll explain this bit by bit in a moment. The result should look like this:
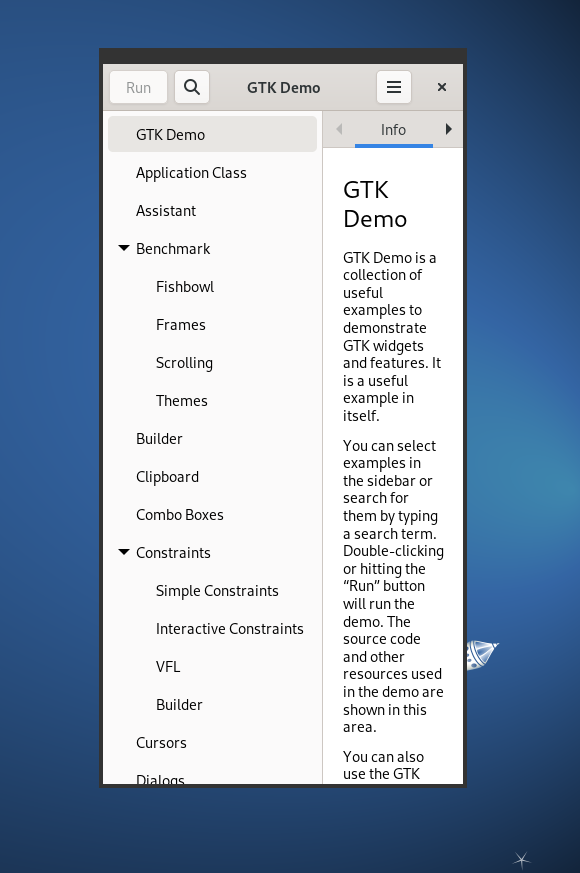
While this might look like just another application on your desktop it’s in fact a Wayland compositor (phoc) that runs nested on your desktop and displays the gtk4-demo application. Hitting CTRL-C will end phoc and get you back to the terminal prompt.
The first two lines set environment variables that then get passed by the shell to phoc:
WLR_BACKENDS=wayland tells wlroots to use its Wayland backend for rendering – rather than trying to access your graphics hardware. wlroots is a library to write Wayland compositors and phoc is based on it. Other compositors using that library are e.g. Sway and Wayfire.
GSETTINGS_BACKEND=memory tells phoc to read configuration data from GSettings memory backend which doesn’t store anything persistently. The GSettings configuration mechanism is part of glib project and is used a lot within the GNOME ecosystem.
The final line starts phoc with two arguments:
-C /usr/share/phosh/phoc.ini. This tells phoc to use a specific configuration file. The given file makes sure phoc uses a phone-like resolution of 360×720 pixels. You can change the resolution here if you want to test for a different form factor or landscape.
-E gtk4-demo tells phoc to execute (run) the given program. Here it looks up the gtk4-demo in $PATH and runs it.
You can now click around in the gtk4-demo to see which bits fit and which ones don’t fit the screen. While this might look very simplistic it can already be useful. It’s an easy and quick way to validate if a given application fits the phone screen. Just pass the application you want to check after -E. No need to install anything on your phone for that. There will be more on automatic testing in a later posts.
In case you have terminated phoc with CTRL-C, start it again — you need it running for the rest of this post as other Wayland clients will want to connect to it. I’ve condensed the invocation into a single line to make copy and paste easier:
# Same as above but in a single line
WLR_BACKENDS=wayland GSETTINGS_BACKEND=memory phoc -C /usr/share/phosh/phoc.ini -E gtk4-demo
If you want to make a screen shot of phoc running the application you can do this via another terminal window:
# Install grim which will allow to screenshot the phoc window:
sudo apt install -y grim
# Take the screenshot and save to screenshot.png
WAYLAND_DISPLAY=wayland-1 grim screenshot.png
This can be useful in bug reports and documentation. Screen recordings of the nested session can be done via:
# Similar to grim but for recording videos:
sudo apt install -y wf-recorder
WAYLAND_DISPLAY=wayland-1 wf-recorder
What is WAYLAND_DISPLAY=wayland-1 about? As you have two active Wayland displays (the graphical session of the laptop/PC you run this on and the one provided by phoc we launched above) we need to tell Wayland clients that they should run inside our nested phoc. We do that by setting the WAYLAND_DISPLAY environment variable: WAYLAND_DISPLAY=wayland-1. This instructs them to send their Wayland requests over this socket and to listen for events there too. Your host system usually uses wayland-0. You can check the typical Wayland sockets in use via
ls -1 $XDG_RUNTIME_DIR/wayland-?
Phosh
Let’s add the mobile shell to the mix. As Phosh is “just” another Wayland client we can make it connect to the running nested phoc by pointing it to the wayland-1 socket.
export WAYLAND_DISPLAY=wayland-1
export GSETTINGS_BACKEND=memory
/usr/libexec/phosh
The used environment variables should be familiar by now. Note that we directly launch the phosh executable here rather than using the startup script /usr/bin/phosh-session as the later wants to spawn a compositor on its own (and lots of other components). The result should look somewhat like this:
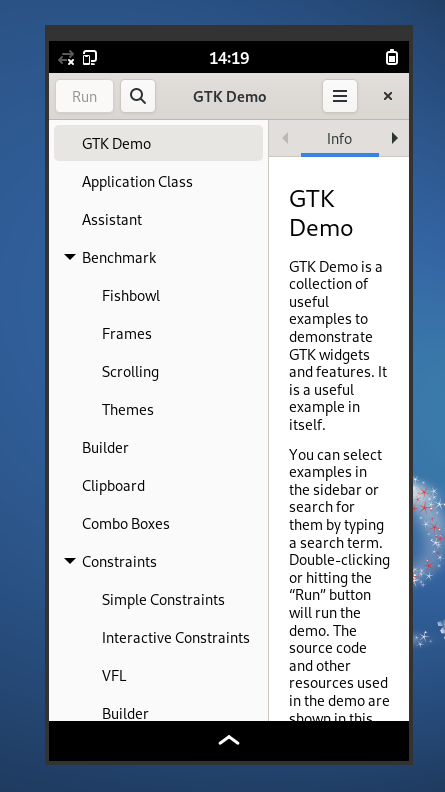
To stop phosh you can hit CTRL-C. There’s no need to stop and relaunch phoc every time you stop phosh. Phosh will reconnect to your nested phoc just fine.
Note: If you want to avoid that phosh attaches to your session’s DBus services (which might affect hot keys, display brightness, etc.) use dbus-run-session /usr/libexec/phosh instead of plain /usr/libexec/phosh.
As phosh is using GTK and glib their debugging options apply here. More on these in later posts but it’s useful to check these out right now as some of them are huge time savers when e.g. debugging layout issues (GTK_DEBUG=layout), when you want to figure out where exactly a critical comes from G_DEBUG=fatal-criticals) or to increase the debug output. To enable full debugging output (very noisy) you’d do:
export G_MESSAGES_DEBUG=all
export WAYLAND_DISPLAY=wayland-1
export GSETTINGS_BACKEND=memory
/usr/libexec/phosh
You can also readily use GTK’s interactive debugger GtkInspector to change properties of the running shell and thus e.g. hide or show widgets, change object properties or modify CSS on the fly:
# Phosh should run inside the nested phoc
export WAYLAND_DISPLAY=wayland-1
# Enable GtkInspector
export GTK_DEBUG=interactive
# GtkInspector should not run inside the nested phoc
export GTK_INSPECTOR_DISPLAY=wayland-0
# Don't mess with our settings
export GSETTINGS_BACKEND=memory
/usr/libexec/phosh
Or in a single line:
WAYLAND_DISPLAY=wayland-1 GTK_DEBUG=interactive GTK_INSPECTOR_DISPLAY=wayland-0 GSETTINGS_BACKEND=memory /usr/libexec/phosh
As we launch GtkInspector outside of the nested session we get the GtkInspector window opened outside the nested phoc (in our regular graphical session) while phosh gets added to the nested phoc as before: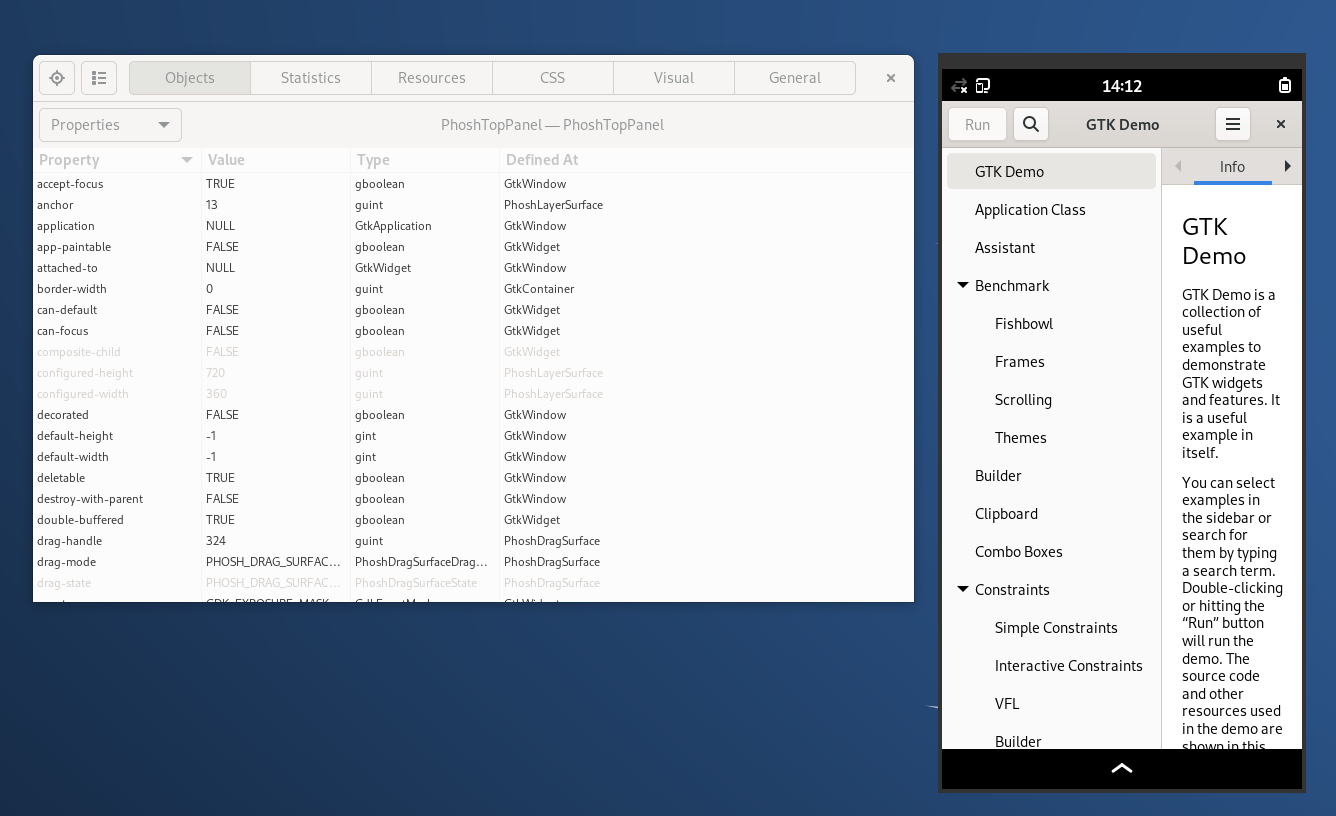
This also works for phosh’s lockscreen (which is way harder to debug on device). GtkInspector allows you to select individual UI elements interactively which is shown in the picture below for the lockscreen’s clock:
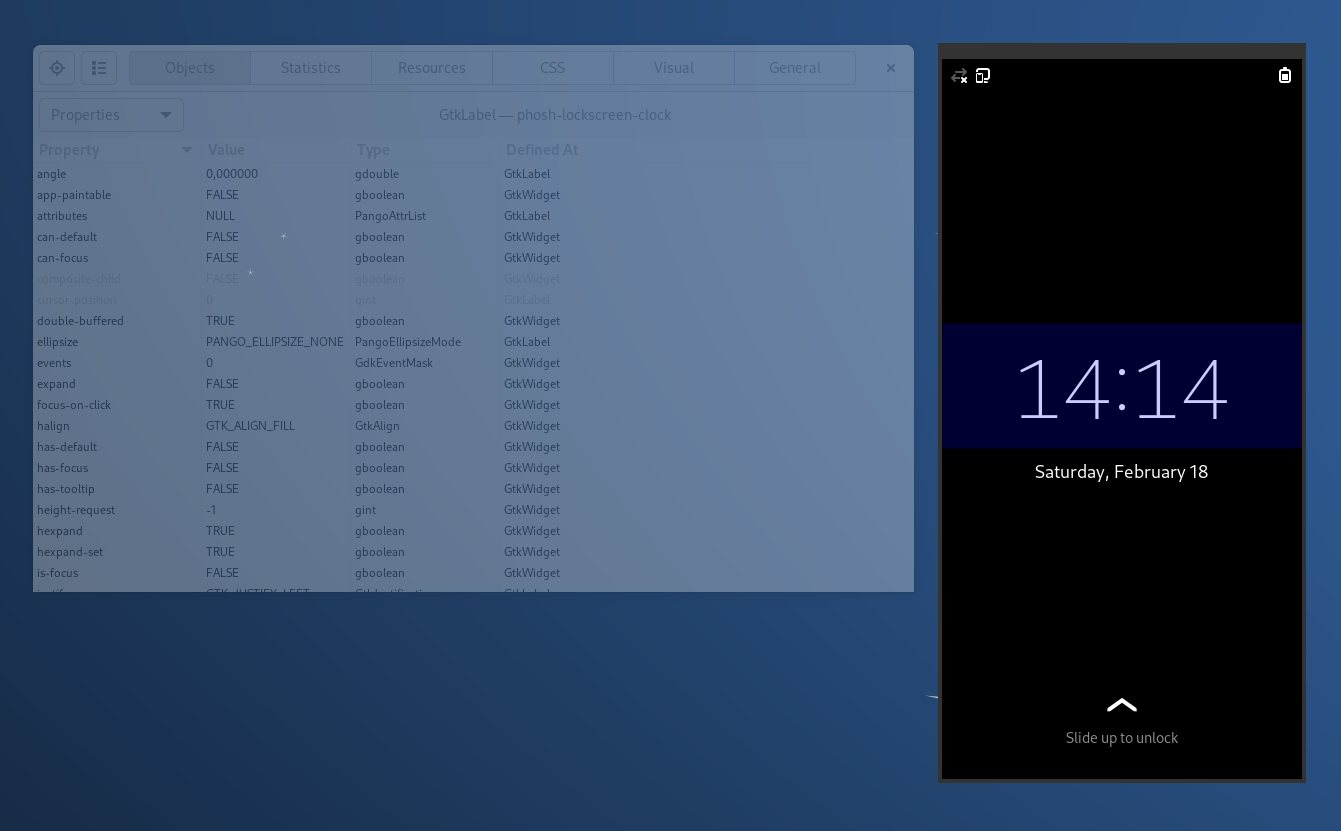
This is a huge time saver when you want to fine tune layout or CSS as you don’t have to rebuild and relaunch phosh for that. It also helps in figuring out CSS selectors.
Here’s a short demo that shows how to launch phoc and phosh and then use GtkInspector to modify the CSS of the running mobile shell:
Closing
With the above tooling it is already possible to check if apps fit on phone sized displays and to inspect and change individual UI elements in Phosh (or other GTK based applications) without rebuilding them. Note that all of this is leveraging already existing features in GTK and wlroots. Phosh and phoc don’t need to add much to the mix here for that to work.
The next episode will show how to modify the mobile shell and what tools are available in Phosh’s source tree to help with that. Stay tuned!
Note: This article has also been published on phosh.mobi</em>
Purism Products and Availability Chart
| Model | Status | Lead Time | ||
|---|---|---|---|---|
 | Librem Key (Made in USA) | In Stock ($59+) | 10 business days | |
 | Liberty Phone (Made in USA Electronics) | Available on backorder ($1,999+) 4GB/128GB | n/a | |
| Librem 5 | In Stock ($799+) 3GB/32GB | 10 business days | |
 | Librem 11 | Out of stock | New Version in Development | |
 | Librem 14 | Out of stock | New Version in Development | |
 | Librem Mini | Out of stock | New Version in Development | |
 | Librem Server | In Stock ($2,999+) | 45 business days | |
 | Librem PQC Encryptor | Available Now, contact sales@puri.sm | 90 business days | |
 | Librem PQC Comms Server | Available Now, contact sales@puri.sm | 90 business days |
Recent Posts
Related Content
- Google’s Lock Down Policy
- Smartphone Study
- DHS Inspector General Study
- Privacy Under Siege: Why Purism’s User Sovereignty Model is the Way Forward
- Wired Confirmed iPhone’s Worst-Kept Secret: Closed Systems Fail at Scale

