PureBoot’s Powerful Recovery Console
Purism
Latest posts by Purism (see all)
- A Quarter Century After Cyberselfish, Big Tech Proves Borsook Right - December 20, 2025
- PureOS Crimson Development Report: November 2025 - December 15, 2025
- Purism Liberty Phone Exists vs. Delayed T1 Phone - December 10, 2025
Normally when we talk about our high-security boot firmware PureBoot, it’s in the context of the advanced tamper detection it adds to a system. For instance, recently we added the ability to detect tampering even in the root file system. While that’s a critical benefit PureBoot provides over our default coreboot firmware, it also provides a number of benefits outside of security that can aid tinkerers who need to recover a system that won’t boot. In this post I’m going to talk about the powerful recovery console PureBoot provides, and explain some of the extra things you can do with it compared to a traditional GRUB recovery console.
This is UNIX, I Know This
Coreboot is a free software boot firmware that we ship on all of our hardware and replaces the traditional proprietary BIOS. When a coreboot-powered system boots, coreboot executes, initializes some hardware, and then executes a payload that can perform the remaining steps of a traditional BIOS to boot the system. Common payloads include SeaBIOS (what we include with our default coreboot builds), GRUB (GRUB is the standard boot loader used by most Linux distributions to select and boot into the OS), or Heads (what we use with our PureBoot firmware).
What makes PureBoot (and Heads) unique is that instead of a small executable, it is a complete, but tiny, Linux environment. It starts like any other Linux system by launching a Linux kernel that then sets up its own root directory and basic Linux tools and then starts the init process which in our case uses the TPM and Librem Key to detect tampering before it boots into your OS. The GUI you see in PureBoot is actually powered by a series of shell scripts and a custom version of whiptail (a tool that lets you create command line GUIs) that adds framebuffer support. When PureBoot boots your OS, it doesn’t run GRUB, instead it parses your GRUB configuration and then uses the kexec command to execute your OS’s Linux kernel directly.
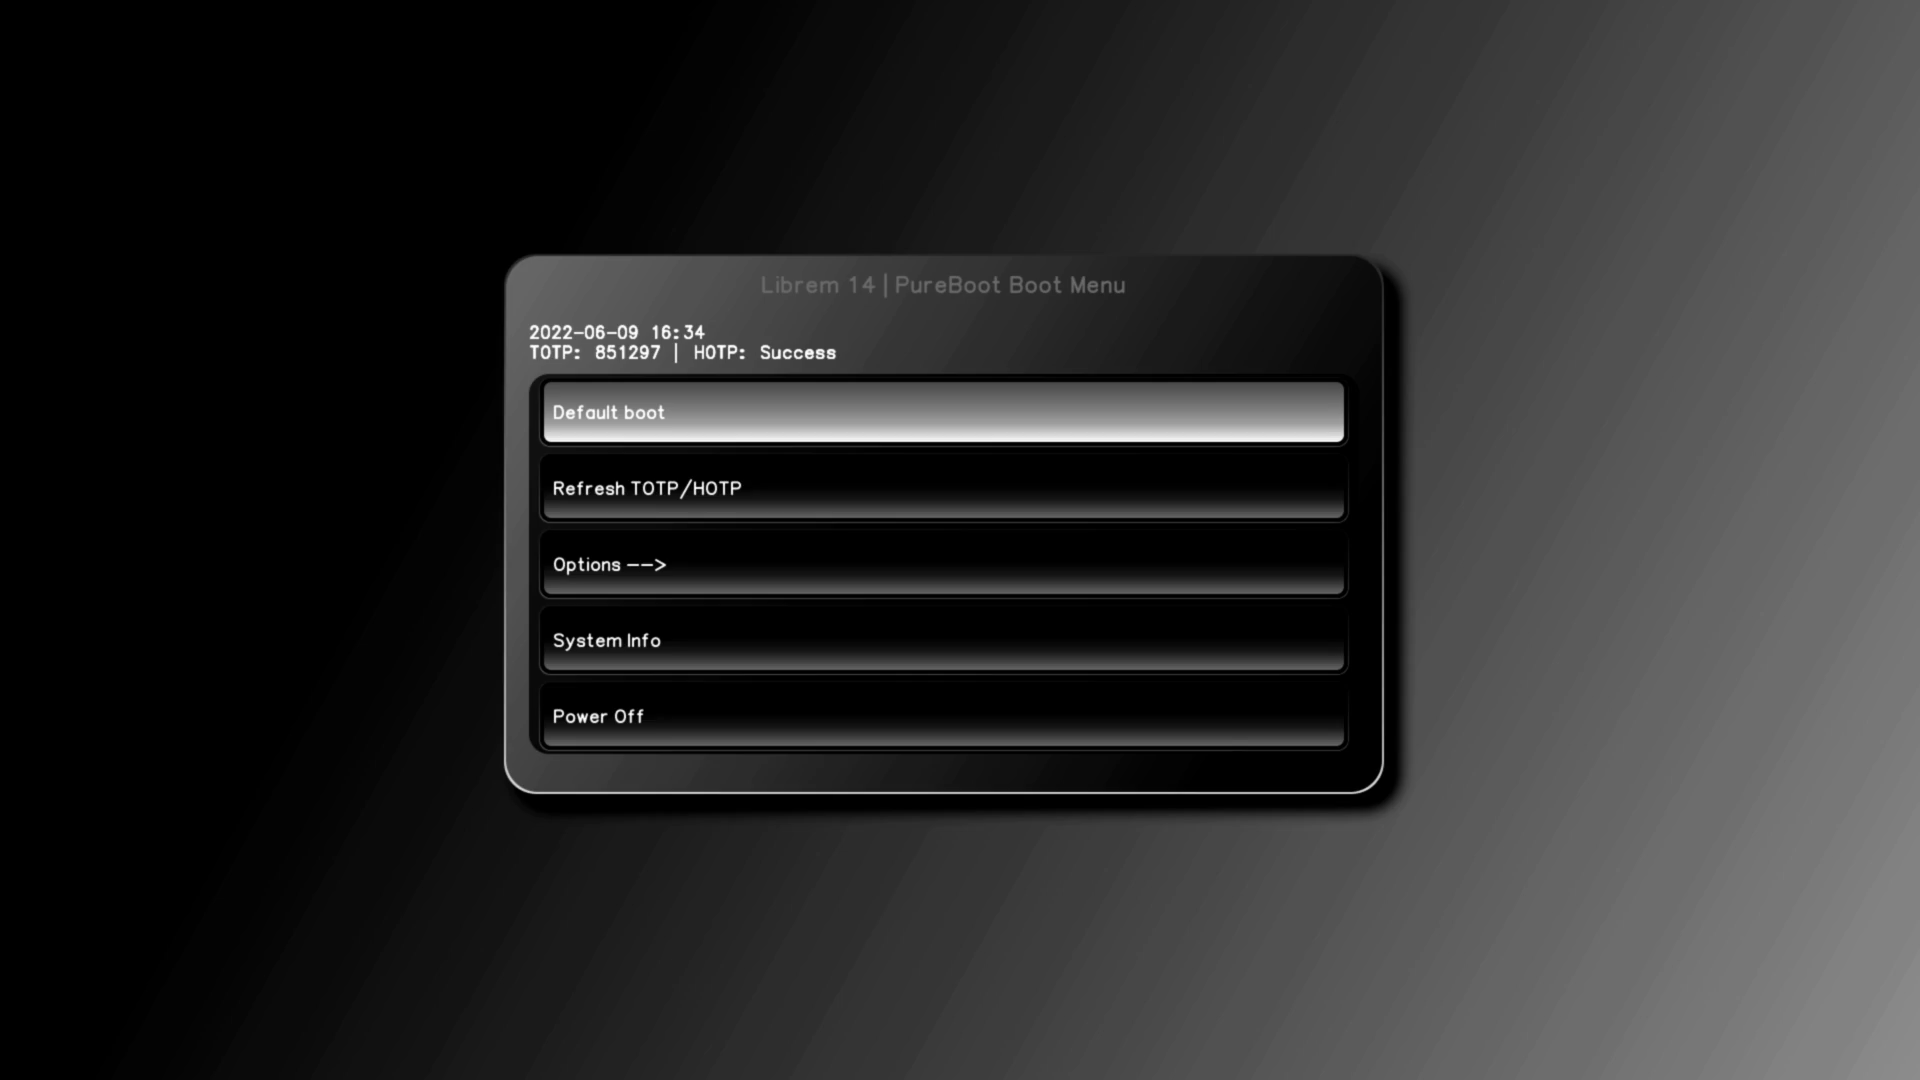
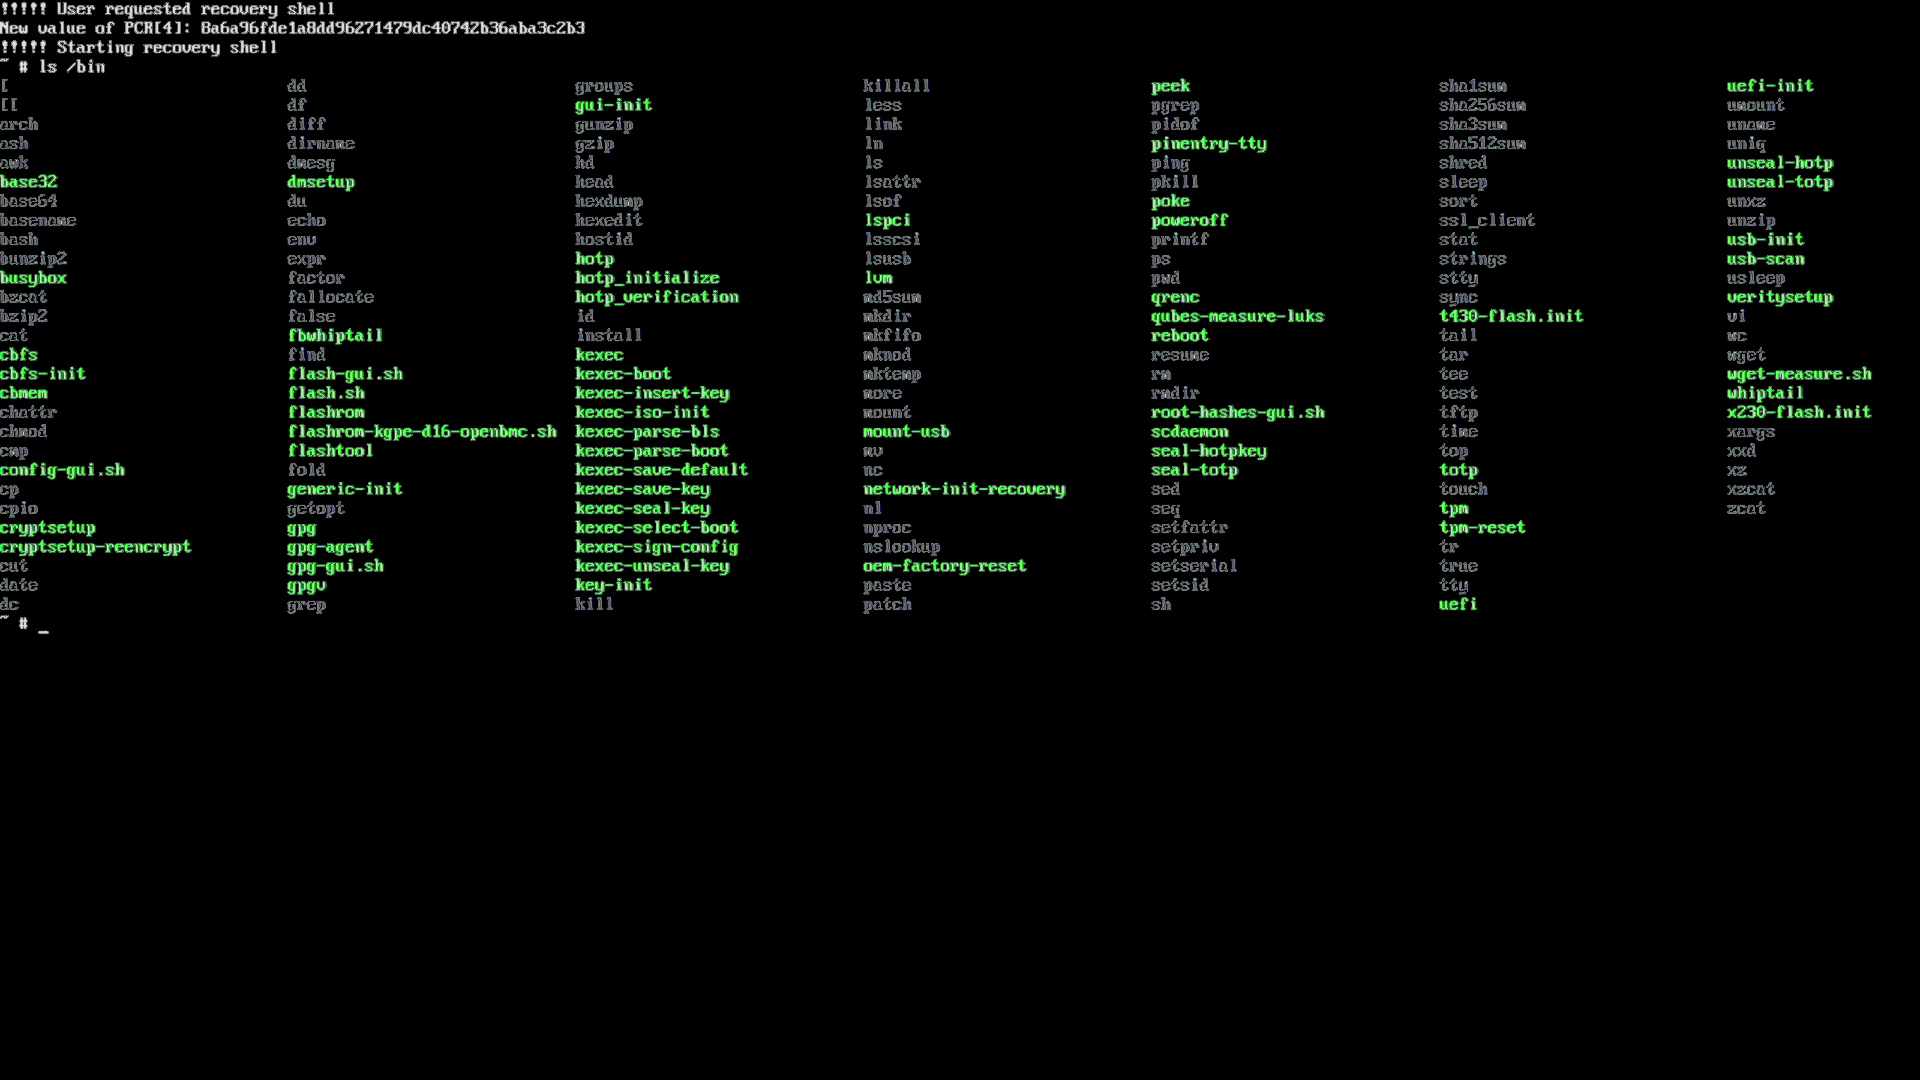
While our current flash chips only provide us with 16MB of storage, you can fit a surprising amount of useful tools in there. The environment uses BusyBox as its shell and includes a number of common shell commands like cp, mv find, dd, df, grep, cut, awk, sed, sort, shred, less, fdisk and vi among many others. There are also a number of extra tools PureBoot includes that it needs to detect tampering and boot the system and maintain itself including gpg, cryptsetup, and cbfs and flashrom (so you can update PureBoot from within PureBoot). While we use all of these tools behind the scenes to power the PureBoot GUI, they also provide a lot of flexibility when it comes to recovering a system that won’t boot properly.
Traditional Recovery Options
I have been using Linux for a long time now, and I like to joke that I’ve learned the most by breaking my system and then having to fix it. One nice thing about Linux has always been that it doesn’t hide its internal workings from you. If you want, you can dive into and tinker with just about everything. There is a lot of power under the hood of a Linux system, and as you are learning and tinkering it’s inevitable that you will break something, resulting in a system that won’t boot.
I’ve written a lot of articles about system recovery over the years, starting with my very first book Knoppix Hacks, which devotes many pages to using the Knoppix live disk to recover a broken system. Many things can prevent a system from booting, but for tinkerers commonly it’s due to using kernels that don’t support the underlying hardware, passing incorrect options to a kernel so that it can’t find your hard drive, damaging critical system configuration files, mistakes when re-installing GRUB to the disk, and more recently also mistakes in disk encryption. Normally to fix these sorts of problems you either resort to the GRUB console, or a rescue disk.
GRUB Console
The GRUB recovery console has gotten much more powerful over the years. Initially your recovery options in GRUB were limited to changing the boot options in a particular kernel to, for instance, change the root device it uses, or add or remove a kernel argument to change how it initializes the underlying hardware (such as disabling the splash screen or enabling framebuffer support). These days the GRUB recovery console also has an interactive shell of its own that exposes custom GRUB-specific commands that will let you perform some more sophisticated recovery as it essentially lets you execute GRUB commands directly.
For instance, you can use GRUB commands to scan the underlying hardware to see what disks and partitions GRUB detects along with their names, so you can more easily fix any mistakes in your kernel arguments. You can see a complete list of GRUB console commands and some examples of how to use them here, but in essence they are limited to fixing GRUB itself and not the underlying system. For that you traditionally need a rescue disk.
Rescue Disk
Normally when a system won’t boot, the simplest option is to boot a rescue disk over USB. One of my first and favorite rescue disks was Knoppix simply because it wasn’t focused strictly on recovery and so it included all sorts of other useful tools that made recovery simpler in a full desktop environment. Most major Linux distributions (including PureOS) now include some sort of live rescue disk mode as part of their installation disk. This allows you to boot from USB into a full OS with a suite of common command line (and sometimes GUI) tools you can use to inspect and repair a system. Some of these disks also include a special recovery menu that walks you through and automates common recovery steps, such as re-installing GRUB to the disk, rebuilding the GRUB configuration file, or detecting and mounting the underlying root partition.
What makes a rescue disk so powerful for recovering a system that won’t boot, is that it typically has a full suite of common Linux tools so you can mount the underlying disk, browse through it to find and repair mistakes in configuration files, and even chroot into that disk and run commands to reinstall GRUB, install or remove kernels or other software, and repair mistakes in init scripts. Normally they also provide you with Internet access so you can research troubleshooting steps and even download additional software in some cases. The one downside to a rescue disk is that you have to have it with you, to be useful.
The PureBoot Recovery Console
The PureBoot recovery console sits in between the GRUB console and a normal rescue disk in terms of what you can repair with it. It provides you with many more options with an easier-to-use command line than GRUB, but of course can’t compete with the suite of tools that a multi-gigabyte rescue disk includes. Yet everyone doesn’t always have a rescue disk handy, and PureBoot provides enough tools that with some Linux command-line know-how, you can repair a lot of common issues that prevent a system from booting without having to resort to a rescue disk.
To launch the PureBoot recovery console, select Options -> Exit to Recovery Shell from the PureBoot main menu. This will drop you to a standard Linux command line BusyBox environment with normal command-line tools. Let’s go over a few recovery tasks you can perform using the tools in the PureBoot recovery console.
Repair GRUB Settings
Mistakes in your GRUB configuration file are a common problem that can prevent a system from booting. You can repair these mistakes in the console by editing the grub.cfg file directly. By default PureBoot will mount your /boot partition in read-only mode if detected, so you can browse and inspect files there. Otherwise you can use the standard command line mount tool to mount it.
To make changes in /boot you will need to remount it as read-write using mount -o remount,rw /boot. Then you can use the classic command-line text editor vi to edit the grub.cfg directly. Because PureBoot parses the grub.cfg directly and doesn’t actually run GRUB itself, there’s no need to re-install GRUB if there were a mistake there, you should be able to resolve any GRUB issues just by modifying the config file.
Repair Kernel Issues
For the most part you can resolve problems with a bad kernel by booting the previous kernel in the menu. Since the console gives you full access to the /boot partition, you can browse through it to see what kernels are present, and even add and remove files directly in case you really get into a jam.
Access USB Storage
While PureBoot doesn’t provide network access, you can still transfer files to the underlying computer using USB storage. First run the usb-scan tool which will load the appropriate kernel modules for USB support and then attempt to detect available USB storage and present it to you in a GUI menu. You can either select one of the storage options in the GUI and have PureBoot automatically mount it, then hit Ctrl-C to drop back to the console, or select Abort and mount it yourself manually.
Modify Encryption Settings
PureBoot also provides the cryptsetup command-line tool which you can use to change settings for your LUKS-encrypted disks. This can be useful if you want to change disk encryption keys, add new keys, or otherwise modify the settings from a trusted environment.
Access the Root Partition
Many times a system will boot partially only to fail due to an issue with a system setting or init script. To repair this you need access to the root partition so you can modify files. You can use the cryptsetup command-line tool to unlock the disk with cryptsetup luksOpen /dev/sda2 cryptroot. Replace /dev/sda2 with the path to your root partition. Then you can mount the root partition with mkdir /mnt; mount /dev/mapper/cryptroot /mnt.
Once the root partition is mounted, you can then browse through it on the command line and use vi to edit broken config files, use standard command-line tools to move around and repair other files, and less to review logs. One thing you won’t be able to do is use chroot to change into the root partition directly and run native commands. This is because the PureBoot recovery console is running from the flash chip with binaries cross-compiled for that chip. It won’t be able to execute binaries built for the main CPU.
Install Boot Firmware
While we offer a GUI method to reflash coreboot and PureBoot within the PureBoot menu itself, that method ultimately uses the underlying flashrom and cbfs command-line tool. You can inspect our /bin/flash-gui.sh and /bin/flash.sh scripts to get a sense of how we do it. This also means you can use flashrom and cbfs tools directly if you need, to make changes to the flash chip yourself. Of course this is an option recommended only for folks with coreboot expertise.
Tinker with PureBoot Itself
A final useful feature of the PureBoot recovery console is that you can use it to tinker with and test PureBoot itself. As you browse around the file system you will notice the various shell scripts that power the GUI including /bin/gui-init (the main GUI menu), /bin/gpg-gui.sh (GPG keyring tools), /bin/flash-gui.sh (manages re-flashing PureBoot), and /bin/oem-factory-reset (automates resetting all of the keys in PureBoot). If you want to make custom changes to your own PureBoot environment, a fast way to test custom changes is to make the tweaks first in the recovery console, so you don’t have to spend extra time reflashing PureBoot each time you make a change.
Recovery In Your Control
Many companies would be tempted to hide something as powerful as this recovery console within a special debugging version only for developers. We feel that it’s important that people be in control of their own computers, and having access to these recovery tools puts you in control over your system’s recovery. While you hope you never have to use them, by having a powerful set of recovery tools right there in the boot firmware, those of you who enjoy tinkering with your systems have an extra set of options at your disposal when you inevitably break something.
Purism Products and Availability Chart
| Model | Status | Lead Time | ||
|---|---|---|---|---|
 | Librem Key (Made in USA) | In Stock ($59+) | 10 business days | |
 | Liberty Phone (Made in USA Electronics) | In Stock ($1,999+) 4GB/128GB | 10 business days | |
 | Librem 5 | In Stock ($799+) 3GB/32GB | 10 business days | |
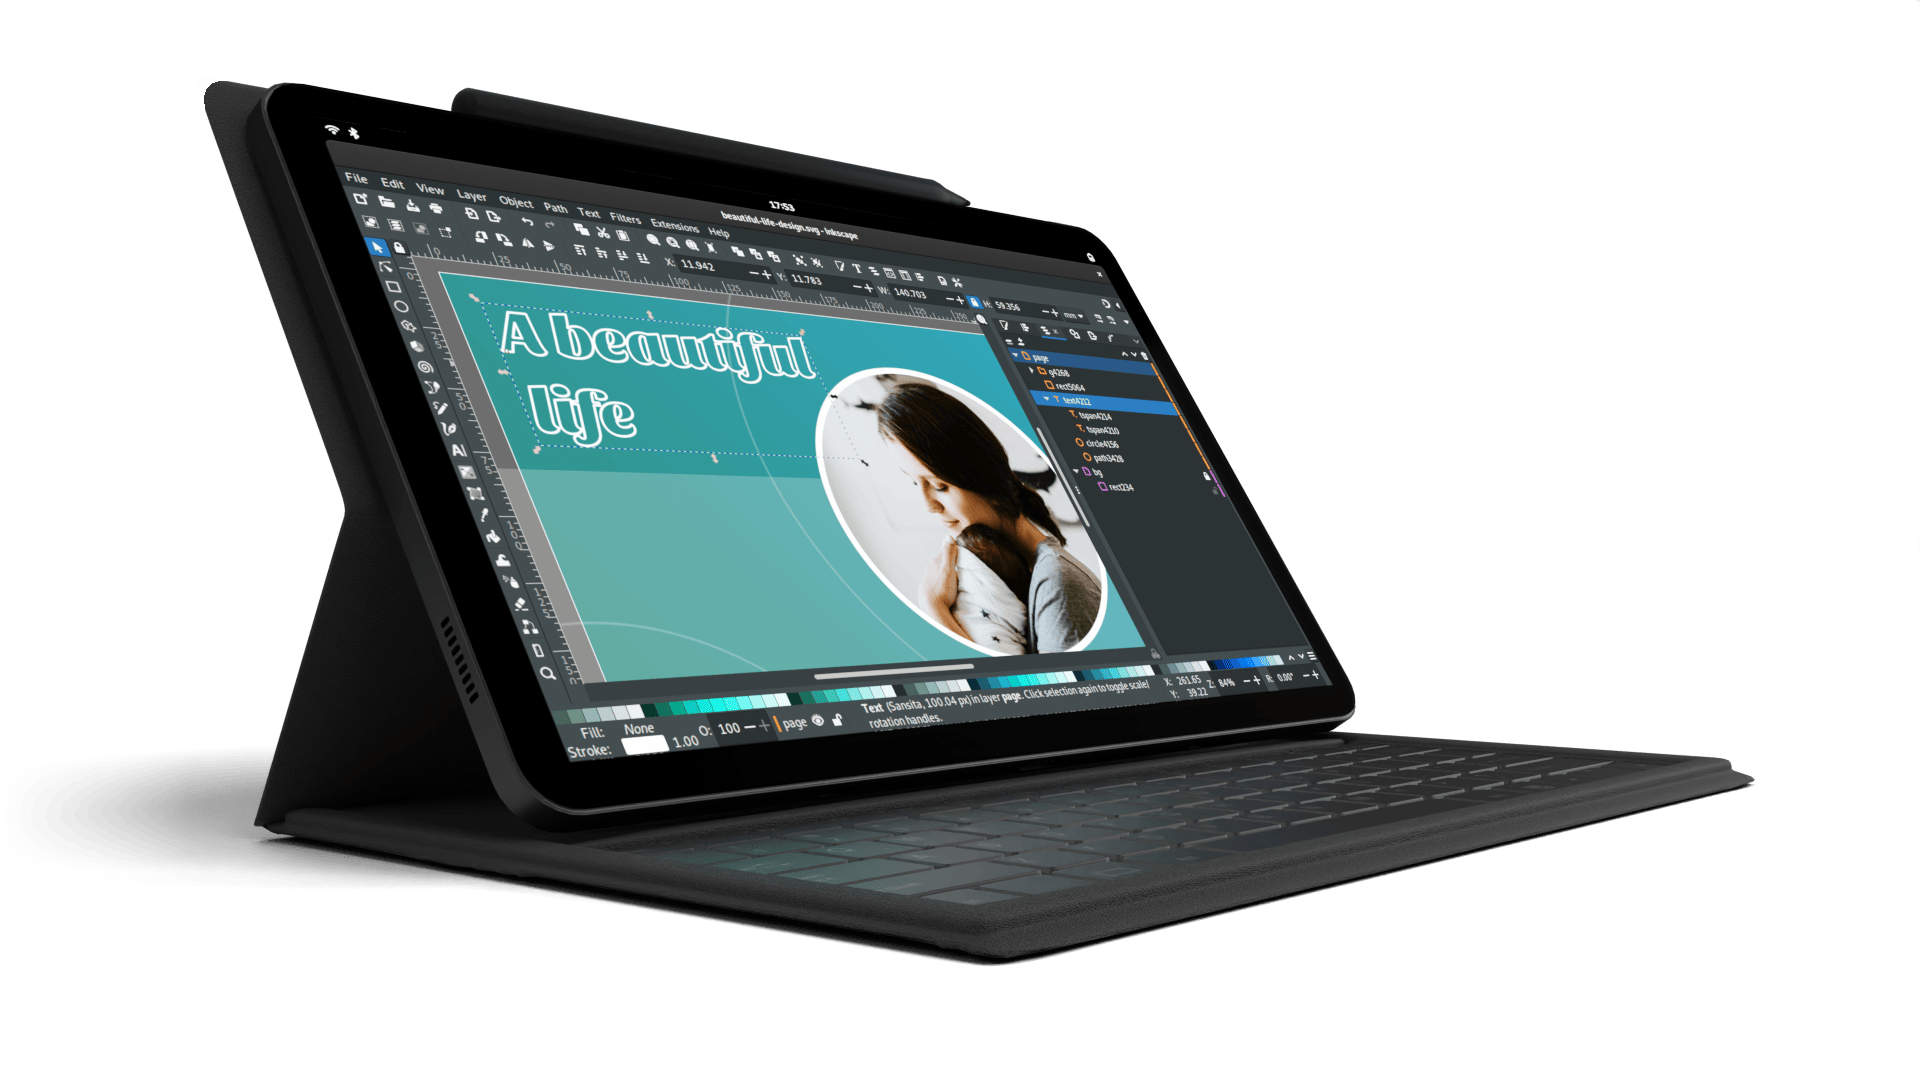 | Librem 11 | In Stock ($999+) 8GB/1TB | 6+ weeks | |
 | Librem 14 | Out of stock | New Version in Development | |
 | Librem Mini | Out of stock | New Version in Development | |
 | Librem Server | In Stock ($2,999+) | 45 business days | |
 | Librem PQC Encryptor | Available Now, contact sales@puri.sm | 90 business days | |
 | Librem PQC Comms Server | Available Now, contact sales@puri.sm | 90 business days |
Recent Posts
Related Content
- Landfall: A Case Study in Commercial Spyware
- Consent On Everything?
- 60 Minutes Uncovers Hacks on America’s Infrastructure
- Code is Power!
- Purism Approach vs. Google Model


